Showing posts with label Cakes. Show all posts

21 Jul 2014

Mini Raspberry Cream Brownies - Recipe


These petits fours are 'high faff' and take a bit of patience to make but they are well worth it. They're quite rich and I could only manage to eat one, which is no bad thing, because I really wouldn't want to know how calorific they are.

I've got a few raspberry canes at the bottom of the garden, there's nothing quite like home grown raspberries, they are in a league of their own.

My hob is induction and melting chocolate is a dream, it's possible to place the chocolate in a pan and melt it gently on the hob, it's so much easier than melting chocolate over a pan of water and I find the chocolate never overheats.

The cream is made from raspberry puree, cream and melted white chocolate, I added a little red food colouring to brighten up the raspberry cream to give it a pretty pink colour.

When I piped these I didn't let the raspberry cream chill down for long enough
I'm off for a week to eat at a few posh restaurants and some not so posh, drink coffee at some trendy coffee shops and some not so trendy.......but meanwhile I'll leave you with the recipe for these fabulous brownies.....

You will need:  22cm square baking tin, greased  and lined with baking parchment so the paper extends over all four sides.  4cm cutter.

80g salted butter
150g dark chocolate
115g caster sugar
2 small eggs
1 tsp vanilla extract
60g plain flour
3 tbsp cocoa powder

Raspberry Cream
250g raspberries
1 tbsp icing sugar
60ml cream
125g white chocolate

1. Preheat the oven to 160ºC.
2. Place the chocolate and butter into a bowl and place over a saucepan with gently simmering water. Stir until the butter and chocolate have melted. Remove the bowl and allow to cool.
3.Place the sugar, eggs and vanilla in a bowl and mix until pale and creamy.
4. Fold in the cooled chocolate.  Sift over the flour and cocoa powder.
5. Pour into the baking tin and cook for 15-20 minutes. Cool in the tin. Place in the fridge for an hour.
6. Raspberry Cream.  Place 125g raspberries with the icing sugar into a food processor and blend until smooth.  Strain through a fine sieve. Add the raspberry puree to a small saucepan along with the cream and bring to the boil.  Add the pieces of white chocolate to the pan, remove from the heat and spoon the raspberry cream over the chocolate pieces.  Leave it for approximately 5 minutes and then whisk to a smooth glossy sauce.  Pour into a bowl and place in the fridge until chilled and set.
7. Take the cake out of the fridge, remove the cake from the tin.  Place on a board and cut out rounds using the cutter.
8. Place the chilled raspberry cream into a piping bag fitted with a 1M Wilton nozzle and pipe onto the brownie rounds, top with a fresh raspberry.

I'm submitting this post to the recipe linky #cookblogshare over at Supergolden Bakes.......

22 May 2014

Black Forest Cake - Recipe

Our first cherries this year
Some days it's easy to misjudge how long things are going to take and I didn't allow enough time to make my cake, hence the Black Forest cake is a 'little messy' on the sides of the cake. Once the cream was 'set'  I couldn't clean up the outside of the cake.  On the positive side I don't want my cakes to look as though they have come off a production line - I like the homely side of baking.

There are quite a few stages to making the finished cake and lot's of kitchen equipment is used, which equals loads of washing up, the dishwasher was definitely my best friend when I made this cake.

First stage is the chocolate base which wasn't chocolatey enough but I have allowed for this in the recipe below.  Second stage is a chocolate layer which is spread over the sponge cake.  Third stage is to puree a half a jar of sugar free cherry jam,  I used half a jar of Cerises Griottes, Montmorency Cherries which was a purchase from Le Pain Quotidien, and spread this over the set chocolate, third stage is to make a set cream topping, fourth stage is to make chocolate shards.

I was brought up on frozen Black Forest Gateaux(which I loved at the time) and this cake is thankfully on another level.......

The tin needs to be lined so the cake can be easily lifted out
Dark Belgian Chocolate is melted and spread over the upturned sponge cake
At last I got round to using the jar of jam that has been sitting in my store cupboard
Cherries from my greengrocer and quickly made shards of dark Belgian chocolate
The chocolate sponge layer was a bit shy of that lovely chocolate taste
but this cake is amazingly delicious
You will need:  20cm square baking tin lined with baking parchment - the lining paper needs to come 5cm above the tin to enable the cooked sponge to be lifted out of the tin.

For the cake
3 Eggs
100g Caster Sugar
75g Plain Flour
1 tsp Baking Powder
25g Cocoa Powder

Fruit Layer
Half a jar of unsweetened Morello Cherry Jam
1 tbsp either Kirsch or Brandy

Chocolate Layer
70g Dark Belgian Chocolate (I used Waitrose)

Cream Topping
2 tbsp Kirsch or Brandy
5 tbsp Icing Sugar
2 Gelatine Leaves
200ml Whipping or Double Cream

1.  Preheat the oven to 180ºC.
2.  Beat the eggs and sugar together until a whisk leaves a trail.
3.  Sift over the flour, baking powder and cocoa powder and fold in gently.
4.  Pour the batter into the baking tin and bake for 30 minutes. Cool in the tin.
5.  Remove the cooled cake from the tin by holding the baking paper.
6.  Place the cake onto a plate.  Melt the chocolate carefully over a pan of simmering water.
7.  Pour the melted chocolate over the sponge and leave to set.  Place in the fridge to harden.
8.  Puree half a jar of cherry jam with a tablespoon of kirsch or brandy and carefully spread over the set chocolate.
9.  To make the cream: put the kirsch into a small saucepan with the sieved icing sugar and place on a gentle heat.  Soak the leaf gelatine as per the manufacturers instructions. Whilst the pan is still on a gentle heat, add the soaked gelatine and stir to dissolve in the kirsch/brandy and icing sugar mixture.  Whisk the cream to the floppy stage and fold in the gelatine mixture.  Spread the cream over the pureed jam.
10. Make the chocolate shards.  Once the shards have been made place them into the freezer - because they are so thin they can be difficult to handle.
11. Decorate the cream with cherries and the chocolate shards.
12. Eat and enjoy - best served with some runny double cream.

3 May 2014

Coffee Crunch Bars - Recipe

Coffee Crunch Bars
I love coffee and cake and these small crunchy bites were a fabulous accompaniment to my mid- morning latte.  If I was able to choose one of these cakes in a coffee shop I'd be more than delighted.  The sponge layer is light and the coffee and spiced crunchy topping is drizzled with an espresso icing.

I buy espresso powder for baking but it can also be used in chilli con carne for richness, depth of flavour and colour.

Makes: 18

You will need:  18cm shallow square tin base and sides lined with baking parchment paper

For the cake:
55g Stork
100g Caster Sugar
1 egg
5 tbsp thick natural yogurt (if there is any whey place into a fine sieve to drain off the whey)
125g self raising flour
½ tsp baking powder
pinch of salt
½ tsp vanilla extract

Topping:
85g plain flour
70g unsalted butter
½ tsp ground mixed spice
1½ tsp espresso powder
70g caster sugar
pinch of salt


Icing:
85g icing sugar
1 tbsp made espresso coffee

1. Preheat the oven to 180ºC.
2. Make the topping - into a bowl place the flour and butter into a bowl and rub the butter into the flour to resemble fine breadcrumbs.  Stir in the mixed spice, coffee and caster sugar.  Put on one side.
3. Make the sponge - add all of the ingredients into a bowl and mix for 2 minutes.
4. Pour the cake batter into the base of the prepared tin and level.
5. Sprinkle the topping evenly over the batter.
6. Bake for 35 minutes and test by inserting a skewer into the centre of the cake, if it comes out clean the cake is cooked.
7. Transfer the cooked tin to a cooling rack.  When the cake has cooled down - remove by holding onto the baking paper and placing on the cooling rack until completely cold.  When cold carefully remove the baking paper.
8. To make the icing - place the icing sugar into a bowl, gradually add the coffee.  If the mixture is too thick add a little water.
9. Place the cooled cake onto a board, cut into 18 pieces and drizzle over the icing.  Leave to set.

More recipe ideas using espresso powder
Cappuccino Cupcakes
Coffee Cappuccino Creams with Cream and Sweet Coffee Sauce

27 Apr 2014

Mary Berry's Lemon Drizzle Cake - Recipe

Lemon Drizzle Cake with a Crunchy Topping
I've been making this recipe for more years than I care to remember.  It's easy to make, only requires a few ingredients, bakes well and freezes too - not forgetting it is amazingly delicious.

This last week I've been away from home and it doesn't leave any time for baking, but I just managed to find time to make this Mary Berry recipe.  There are lots of recipes for lemon drizzle but this one has a tender crumb and the granulated sugar topping is perfect.

Mary Berry calls these Crunchy Lemon Syrup Loaves
Instead of making loaf cakes use a small oblong tin and make a traybake
 or the batter can be used to make cupcakes
It can get a bit messy in my kitchen!

You will need:
2 eggs at room temperature
175g self-raising flour
175g caster sugar
100g soft margarine (Stork)
1 tsp baking powder
finely grated zest of 1 lemon
4 tbsp milk

For the crunchy topping:
100g granulated sugar
juice of 1 lemon (to get more juice from the lemon simply pierce the lemon and place in the microwave for 10 seconds)

2 x 450g loaf tins, greased and lined

Method:
1. Preheat the oven to 180°C.
2. Beat together the soft margarine, eggs, flour, caster sugar,  milk, baking powder and lemon zest until smooth, using an ice cream scoop place the batter into the prepared loaf tins.
3. Bake for about 35 minutes until golden brown.  Place the tins onto a wire rack to cool.
4. Whilst the cakes are cooling, make the topping by mixing together the granulated sugar and lemon juice.
5. Leave the loaves in their tins and pour the topping over them.  Leave to cool before removing from the tins.

More Lemon Drizzle Cake Recipes:
This Year:          Almond and Lemon Drizzle Cake Bars
Four Years Ago: Lemon Drizzle Cake - National Baking Week

4 Apr 2014

Hummingbird Cake - Recipe

The cake has to be stored in the fridge or cut into portions and freeze
The last three cakes I've made have used tinned crushed pineapple and thankfully I have now used up the last tin...........I chose to make this cake because I love the name Hummingbird Cake!

Apparently this cake recipe has been around since the 19th century and is a tradition in the Southern United States.  Hummingbird cake is made using coconut, banana, spices, crushed pineapple and pecans, with a cream cheese frosting.

The 'cake lady' at my local coffee shop used to make this cake and it goes perfectly with a cup of coffee, but for me any cake goes perfectly with a cup of coffee.

Hummingbird Cake
It's a really easy cake to make and you don't need any fancy kitchen equipment - all you need is a bowl, spoon and a sieve.

You will need:  23cm square cake tin greased and base lined.

Ingredients:
450g can crushed pineapple
150g plain flour
75g self-raising flour
1/2 tsp bicarbonate of soda
1/2 tsp ground cinnamon
1/2 tsp ground ginger
220g soft light brown sugar
45g desiccated coconut
2 ripe bananas, mashed
2 eggs
180ml vegetable oil

1. Preheat the oven to 180ºC.
2. Pour the contents of the tin of crushed pineapple into a sieve set over a basin and leave to drain. Press down with a potato masher to get the syrup to drain into the bowl.  Reserve 60ml of the pineapple syrup for later.
3. Sift the plain and self raising flour into a bowl, followed by the bicarbonate of soda and spices. Add the sugar to the bowl, stir in the drained pineapple, reserved syrup, coconut, banana, eggs and oil.  Pour the cake batter into the cake tin.
4. Bake the cake for approximately 40 minutes. Leave the cake in the tin for 10 minutes, remove the cake to a rack to cool.

Cream Cheese Frosting
30g butter, softened
60g full fat cream cheese, softened
1 tsp vanilla extract
240g icing sugar
Pecans, chopped to decorate

1. Cream the butter and cream cheese together in a large bowl.  Add the vanilla extract and gradually beat in the sifted icing sugar.
2. Spread over the cooled cake.
3. Decorate with chopped pecans.


26 Mar 2014

Pineapple and Lime Cake - Recipe


This cake uses tinned crushed pineapple but a tin of pineapple slices or cubes can be used, unfortunately fresh pineapple wouldn't work because you need to use the juice from the tin.

The topping is a cream cheese icing and I know recipes always say cakes can't be frozen with this icing but I find they thaw without any problems.  I always slice and freeze my cakes otherwise I'd end up the size of a house.

The cake is full of fabulous ingredients and we loved it
You will need:  20cm springform tin cake tin buttered and lined - I lined the base and sides.

Ingredients:
200g butter softened
200g light brown sugar
4 large eggs
200g self raising flour
1 tsp baking powder
1 tsp ground cinnamon
1 tsp ground mixed spice
225g tin crushed pineapple
1 tsp vanilla extract
zest and juice of 1 lime

For the icing:
200g full fat cream cheese
70g butter, softened
400g icing sugar, sifted
Zest of 1 lime
2 tsp lime juice

1. Preheat the oven to 170ºC/Fan 150ºC.
2. Add the butter and sugar to a mixing bowl. Beat until light and fluffy.
3. Beat the eggs together, add a little at a time to the cake batter.
4. Sift together the flour, baking powder and spices.  Fold into the cake batter.
5. Stir in the pineapple, pineapple juice, lime zest and juice and vanilla extract.
6. Pour the cake mixture into the prepared tin.  Bake for 30 minutes or until a cocktail stick placed into the cake comes out clean.
7. Place the tin on a cooling rack and leave to cool for 15 minutes. Remove the cake from the tin and place on the rack to cool completely.

To make the icing:
1. Beat the cream cheese and butter together until light and fluffy.
2. Add the sifted icing sugar a little at a time otherwise you will end up with icing sugar all over the kitchen, beat until smooth.  Add the lime juice and beat again.
3. Spread over the cooled cake and decorate with the zest of a lime.


13 Mar 2014

Carrot Cake with Coconut and Pineapple - Recipe


I'm always happy to buy a coffee and a piece of carrot cake from Pret - the one I usually head for is situated in Selfridges Food Hall. It's the perfect place for a spot of people watching.

I really prefer indie coffee shops, but in the week they've mostly been taken over by 'suits' and laptops - try going into them with shopping bags and you feel like Bridget Jones entering the board room wearing the wrong attire.

Pret make the lightest moist carrot cake and I'm always happy with their coffee too, to be fair I like everything from Pret.  I've had their cookery book 'Food on the Move' for years now and it's amazing that they have shared their recipes with us.


I made my carrot cake in a tin with individual squares and made nine cakes, they were a bit on the large side though, next time I'm going to try 10 or 11 cakes.  The cake tin came from Lakeland.

Slightly adapted recipe - the iced cakes will freeze and thaw successfully.

You will need:  21cm square baking tin greased and lined with baking paper or a 12 hole square tin greased and base lined.

For the cake:
2 eggs
200g soft brown sugar
150ml vegetable oil
200g grated carrot
50g chopped walnuts
75g diced tinned pineapple
50g dessicated coconut
200g plain flour
1 tsp cinnamon
1tsp bicarbonate of soda
1/2 tsp salt

For the icing: (I made half this quantity)
400g sifted icing sugar
100g full fat cream cheese at room temperature
50g soft unsalted butter
1tsp vanilla extract

1. Preheat the oven to 150ºC.
2. Take an electric whisk at full speed and whisk the eggs until doubled in volume. Add the sugar, whisk until light and fluffy.  Whisking add the oil slowly.  Whisk until the mixture leaves a trail.
3. Fold in the carrots, walnuts, pineapple pieces and coconut.
4. Sift the flour, cinnamon, bicarb and salt over the batter.  Fold in gently.
5. Place the cake batter into the baking tin.  Bake for 1 hour for the square tin or 40 minutes for the small square cakes.
6. Cool the cakes for 15 minutes and turn out onto a cooling rack.

Method for the icing:
1. Beat the butter, cream cheese and vanilla extract together.
2. Beat in the sifted icing a third at a time (carefully otherwise the kitchen will be covered in icing sugar)
3. Spread the icing over the top of the cake.
4. Decorate.

7 Feb 2014

Almond and Lemon Drizzle Cake - Recipe


I can't resist kitchen gadgets and when I had a new kitchen it was a given I was going to choose ovens that require a few weeks to figure out how best to use them.

Over the past few weeks I have been trying to get to grips with my combination steam oven.  In the beginning it was all a battle and we both had to go through the pain barrier.  The oven won, I have the burn marks to prove it!  Care is needed when using steam ovens and I learnt very quickly how to use the oven safely.  

There are many steam oven options to choose from and if a separate steam oven isn't for you, main ovens can also be purchased that have a built-in steam function.  I went for a separate combination steam oven to give more options and also to have the facility of a small fan oven. 

One thing to be wary of when deciding to purchase a combination steam oven is some of the sales talk surrounding them.  To quote one salesman 'people are buying these now to replace their microwaves'. His statement is ridiculous, a steam oven cannot replace a microwave.  You wouldn't fill the water container, place your cereal bowl in a steam oven first thing in the morning and then empty the water container and remove all the excess water collected in the oven.

To date I've used it to cook vegetables, fruit, meat, fish and steamed puddings.  I've reheated food, used it to prove my bread dough and baked bread. Over the next few weeks I'll put a few more photographs and recipes on here letting you know how I'm getting on. 

This is my first encounter making a cake using a fan oven with steam. The cake didn't brown as much as I thought it would but on this occasion it wasn't an issue. Cakes which are overcooked can be an issue with conventional cookers - my cake had a very moist crumb and not at all dry, it also only took 20 minutes to bake.   


The lemon crunch topping is slightly different, whilst the cake is warm all you have to do is sprinkle over a layer of granulated sugar, Whitworth's has larger grains of sugar and is perfect for this cake, drizzle over the lemon juice.

I used a mixture of butter and Stork SB to give the cake a lighter crumb.

To bake in a conventional oven:

You will need:  20cm square lined baking tin

60g salted butter, softened
60g Stork SB
125g caster sugar
finely grated rind of 1 large lemon
2 large eggs
125g self-raising flour
65g ground almonds
60g granulated sugar
Juice of 1 lemon, strained

1. Preheat the oven to 180ºC.  Add the butter, Stork SB, caster sugar and lemon rind to a large bowl, mix with an electric whisk until light and fluffy.  Beat the eggs and add gradually to the cake batter, adding a dessertspoon of flour to prevent the batter from curdling.
2. Fold in the flour and ground almonds. Pour the batter into the tin and spread to the edges.
3. Bake for 25 minutes until firm.  Place the cake tin on a cooling rack.
4. Leaving the cake in the tin and whilst it is warm sprinkle over the sugar and drizzle over the strained lemon juice.

One Year Ago - Mary Berry's Gingerbread Traybake - Recipe


25 Jan 2014

Devil's Food Loaf - Annie Bell

Dark, sticky chocolate cake with a tender crumb
I wouldn't make this cake for children it's too dark and chocolaty - the icing is also too dark and chocolaty for children! My cake is so good I don't really want to share it with anyone - although I've made an exception and let hubby enjoy a few slices.  The cake cuts well and is a keeper too - I made this cake last Monday, stored it in a 'Lock and Lock' box and today (Saturday) it is still fresh.

The recipe is by Annie Bell, one of my favourite food writers, her Devil's Food Loaf recipe caught my eye in last weekends Daily Mail You Magazine. I've always enjoyed making her recipes because I can trust them to turn out well.


I love that this is a cake-cum-dessert and a dollop of creme fraiche or ice cream are the perfect partners for the cake.

If you love chocolate cake, you'll definitely fall head over heels for this one. A great cake to make for Valentine's Day and all you have to do is scatter some heart decorations over the icing.

17 Jan 2014

Chocolate and Beetroot Mini Cakes - Recipe

Chocolate and Beetroot Mini Cakes
Mini cakes that look cute make eating mini portions a pleasure and I also like an excuse to use my mini loaf baking tins.  January is the month to measure our food intake and these mini cakes are delicious.

I'm not suggesting for one minute these are healthy mini bites but mentally they definitely lift the spirits on a dull, grey, rainy, January day.

The Craisins are used in the batter mix and I decorated the loaves with them too. Craisins are dried cranberries and a registered trademark belonging to Ocean Spray.

Makes 12 mini loaves
Spray the tins with cake release and it shouldn't be necessary to line the bases
I wasn't sure how many cakes I'd get but guessed if I filled the tins three quarters full I'd stand a chance of them rising enough to produce 12 cakes.

Good guess - it made 12 mini loaves
Decorated they will keep for a couple of days, without icing they can be frozen.

You will need:

75g dark chocolate
75g chopped Craisins
150g grated Beetroot
175g self-raising flour
40g cocoa powder
175g soft brown sugar
250ml vegetable oil
3 large eggs

Method:

1. Preheat the oven to 170ºC.
2. Place the chocolate into a bowl over a pan of gently simmering water until it has melted, stir and cool.
3. Sift the flour and cocoa powder into a bowl, add the sugar, oil, eggs and melted chocolate.  Whisk together and stir in the grated beetroot and Craisins.
4. Pour the batter into the mini loaf compartments until they are three quarters full.  Bake for 25 minutes and allow them to cool in the pans.
5. Remove the loaves from the pan and decorate with icing and extra Craisins.


7 Dec 2013

Iced Holly Christmas Cake


This years cake was inspired by the ribbon I purchased on a Christmas stall. As usual I had no idea how I was going to decorate the cake. Unlike lots of avid cake decorators, I don't sit down and draw out a design but wait for some inspiration to rain down on me.  Hubby often asks how I am going to decorate the cake and more often than not, I am clueless until the last minute.


I made my usual cake recipe and this year chose to ice the cake in ivory sugarpaste. The holly leaves are cut out and left to dry over night on crumpled up tin foil. I then brushed the leaves with gold lustre, wet the edges of the leaves and sprinkled over some disco edible glitter. The holly berries are moistened and rolled in red glitter.

All so very easy and achievable too. Sometimes with cake decorations less is more and the photograph doesn't really do the cake justice.

Tip:  Using a silicone mat (I bought mine from Lidl) helps when rolling out sugarpaste it doesn't stick so easily. I use cornflour to lightly dust the silicone mat and rolling pin instead of icing sugar.  The reasoning is that using icing sugar dries out the sugarpaste.  Also a shiny surface is easily achieved with cornflour.

20 Nov 2013

Mary Berry's Whole Orange Spice Cake

Whole Orange Spice Cake
I took this recipe from Mary Berry's Christmas Collection cookery book which I've had since it first came out in 2006, although there is now an updated version.

It's an easy cake to make but one which requires using a food processor.  My small processor just coped with the amount of batter mix.
The skin was too thick and my orange had to be cooked for an hour or so
The orange should be a thin skinned variety otherwise it won't cook down enough in 20 minutes and will process into hard chunks of orange.

It's a huge cake, well it is for 2 people, I think it will feed 12 easily and because it freezes well without the icing sugar topping, it makes a very inexpensive cake to feed a crowd over Christmas and New Year. If I made the cake again I'd definitely make some type of orange topping rather than the dusting of icing sugar. The cake is very light and moist and I served my cake with double cream.

The star template is reusable and came in an assorted pack from Lidl.

I line the base and sides of my sandwich tins
 to ensure the cake doesn't stick to the tin
The recipe can be found on the Mary Berry website.


7 Sept 2013

Blackberry Buttermilk Sponge

The sponge has a lovely crunchy demerara sugar topping
This easy to make blackberry buttermilk sponge has a lovely tender crumb and if you can get hedgerow blackberries the cake will taste even better. My blackberries came from the supermarket, they were absolutely fine (but make sure they aren't dessert blackberries) or raspberries would be good to use too. The sponge is best served warm and can be reheated gently in the microwave.


I know sometimes it's not convenient to buy buttermilk and a buttermilk substitute can be made by taking 250ml milk (not semi-skimmed) and pouring onto 1 tablespoon of either white wine vinegar or lemon juice and leave to stand at room temperature for 10 minutes.

Recipe is from The Great British Bake Off Everyday cookbook and they recommend serving the sponge with Hot Berry Sauce (recipe in the book). The cake is quite sweet and I think the berry sauce would counteract the sweetness. I served my cake with a dollop of cream.

17 Aug 2013

Raspberry, Chocolate and Almond Cake


It made a welcome change to make a cake that isn't either filled or covered in buttercream but we did serve the cake warm with double cream poured over, and very nice it was too.

Chocolate and raspberries go really well together, the cake will keep covered for a few days in the fridge. It slices well and will freeze too.

The cake testers gave this one the thumbs up.......

I'll let you take a peek behind the curtains of Kitchen Delights new kitchen sometime in September, the finishing touches are taking longer than we anticipated.

In the meantime to make this delicious cake -

You will need:

150g unsalted butter
150g caster sugar
2 large eggs
150g self-raising flour
50ml milk
150g ground almonds
135g dark chocolate chips
150g frozen raspberries
25g flaked almonds
Icing sugar
Double cream to serve

1. Grease and line a 20cm springform cake tin.
2. Preheat the oven to 180ºC.
3. Beat the caster sugar and butter together until it is a light and fluffy consistency.
4. Add the eggs, one at a time and add a tablespoon of flour with the last egg, beating well.  Add the milk and keep on beating.
5. Sieve the flour over the egg mixture and fold in.  Add the ground almonds and chocolate chips and fold these in to the batter.  Now carefully fold in the frozen raspberries.
6. Pour the batter into the prepared cake tin and sprinkle over the flaked almonds.
7. Bake for 60 minutes or until cooked through.  Cool and then release the tin and leave on a wire rack to cool completely.
8. Sieve the icing sugar and dust over the cake.
9. Best served with cream.

10 Aug 2013

Banana Bread - Nigella Lawson Recipe

After cooling cover in cling wrap and place the cake in the fridge,
 slice and open freeze
Good news! I now have a working kitchen, now for the bad news, the kitchen is still to be finished. There is decorating taking place by my husband, a few more electrics to be fitted and various other bits and pieces.

I'm very pleased with the refit, it hasn't been fun being without a kitchen for a couple of weeks or so. I haven't a clue where anything is kept and I'm basically messing about all the time looking for stuff or moving things to another place.

The cooker is taking some getting used to but to be fair I haven't had much time to road test and get to know it.

Fresh from the oven
I thought I would treat my husband to one of his favourite cakes and make this lovely banana bread recipe by Nigella Lawson from 'How to be a Domestic Goddess'. I love the walnuts in the recipe, the heady vanilla extract and the rum soaked sultanas. Those forgotten black bananas in the fruit bowl are best for this to give the cake a light texture.

I've made this cake many times over the years and I definitely prefer to overcook the cake slightly to produce a crust which then softens as the cake becomes sticky. The perfect cake for slicing, lunch boxes and picnics.  This is quite a large loaf cake and I like to slice it and open freeze for another day - the cake is too large for us to get through and I've got my waistline to think of!

The banana bread recipe can be found on Nigella's website.

25 Apr 2013

Individual Carrot Cakes

Individual Carrot Cakes with Cream Cheese Frosting
I can always be tempted by carrot cake, they are a great adult favourite here and a few carrot cake postings can be found on my blog.  A while back I visited a lovely coffee shop in East Dulwich, they had made a huge tray of amazing carrot cake and I would have happily taken the tray home with me. For me, great coffee and a slice of carrot cake are a match made in heaven.

Spray the tins with cake release and fill three quarters full with cake batter.
This recipe isn't too sweet, is light in texture and packed full of flavour - perfect for us.

Mini bundt tins are recommended for this recipe but I used my tin from TKMaxx and half the recommended quantity of ingredients to make six cakes.

The recipe can be found on Edd Kimber's blog - Edd is a past winner of BBC2's Great British Bake Off.

Links to other cake postings:
Passion Cake
Mini Carrot Cakes
Mini Carrot Cakes with Lemon Cream Cheese Icing

The bundt tins recommended by Edd can be purchased from Amazon.


7 Feb 2013

Mary Berry's Gingerbread Traybake - Recipe


A traybake can be made in any square or rectangular tin and you can increase or decrease the quantities to your hearts content. I love a traybake because of its versatility.  A traybake doesn't have to be a cake, it can be a pudding too, cut into squares and open freeze for a rainy day. It was Mary Berry who back in the day first introduced me to the wonders of a traybake bake, and true to say it lost favour for many, many years.

Iced and decorated gingerbread.
The batter waiting to go into the oven for baking.
When I first married I used to watch her on TV (I was a child bride!),  I then went on to purchase my first cookery book, which was The Hamlyn All Colour Cookery Book and I can remember they updated this quite a few years after it first came out.  When Mary contributed to Home & Freezer Digest I used to buy this from the newsagents and can remember saving every copy.

I bought a copy of Mary Berry's Complete Cookbook and gave my children a copy of this too, to use for reference, and hopefully cook a few recipes.  My daughters husband uses this cookery book and makes a fabulous Potato Dauphinoise, another favourite is Potato Lyonnaise, he has also turned out a few memorable starters using recipes from this book.

Some of my Mary Berry cookery books - do you have a collection too?
There are a few recipes on my site that I have cooked from Mary Berry cookbooks and they are all delicious.  One of my favourites is her Lamb Tagine and this is one of the best tagine recipes ever. A couple of her books on my wish list are Mary Berry's Family Sunday Lunches and her latest cookbook, Mary Berry at Home.

The following recipe is taken from Mary Berry's Ultimate Cake Book - I always halve this quantity and use a 18 x 28cm tin.  Freeze un-iced.

Slightly adapted recipe.  For this quantity of mixture you will need a 30 x 23cm tin lined with parchment paper.

275g golden syrup
275g black treacle
225g dark molasses sugar
225g unsalted butter
450g self-raising flour
2 teaspoons mixed spice
2 rounded teaspoons ground ginger
4 eggs, beaten
4 tablespoons milk

For the icing:
225g icing sugar
2 tablespoons lemon juice
50g crystallised ginger finely chopped.

1. Preheat the oven to 160ºC/325ºF/Gas 3.
2. Measure the syrup, treacle, sugar and butter into a large pan.  Heat very gently until the butter has melted.  Remove from the heat and stir in the flour and spices.  Add the beaten eggs and milk, beat until smooth.
3. Pour into the lined tin.
4. Bake for 45-50 minutes until beginning to shrink away from the sides of the tin.
5. Cool in the tin.
6. When cold lift out of the tin and remove the lining paper.
7. Sift the icing sugar into a bowl, add the lemon juice, drop by drop and mix until smooth.
8. Decorate with the chopped ginger and leave the icing to set.
9. Cut into squares.


20 Jan 2013

Recipe: Chocolate and Beetroot Cake


Chocolate and Beetroot Cake - I have held back making this, even though it has been a popular bake with food bloggers.  The thoughts of a beetroot splattered kitchen and the earthiness I associate with beetroot had no appeal.

After feeling 'so last year' or is it the 'year before last' I decided Chocolate and Beetroot Cake should appear on the blog. After some research, the recipe in Fiona Cairns book Bake & Decorate appealed, mainly because the cake is made with vegetable oil which gives a light cake.

No grating, no mess. Simply cut the beetroot into chunks (I bought prepacked), place in the food processor and blitz to a puree = no splattered kitchen.

I made the cake in a springform tin because I didn't want to chance spoiling the cake when turning out. Some retained beetroot juice from straining the pureed beetroot is the natural food colouring for the icing. The icing is a lovely pink colour and it doesn't taste of beetroot.

Fiona suggests drizzling and flicking the melted chocolate over the cake to make an abstract design.  Is this something you learn at a chocolate masterclass?

The sensible persons guide is to drizzle the melted chocolate over the cake, I always put the cooled melted chocolate into a ziplock food bag and cut a tiny corner off the base of the bag. Or simply dip a teaspoon into the melted chocolate and drizzle over the cake, not my choice because I make chocolate blobs and somehow my drizzles don't happen.


The cake is a winner, easy to make, deep chocolate flavour, moist, has a tender crumb, cuts well and is a keeper.  This is a large cake and would easily feed twelve people. If you are looking for a cake recipe to feed a crowd then look no further.

I am entering my cake into the January Calendar Cakes Challenge. This is hosted by Dolly Bakes and Laura Loves Cakes - Laura is hosting this month.

24 Dec 2012

Catch A Falling Star Christmas Cake


This years Christmas Cake is perhaps one of my easiest.  I used a large star shape to cut through to the marzipan layer, carefully lifted out the fondant star and filled with small silver dragees.  The silver beads around the base of the cake and the rope of silver stars I used as a cake topper are Christmas tree decorations.

Why Catch A Falling Star?  The silver star cake topper wouldn't stay on top of the cake whilst I was trying to arrange them and I had to keep catching the falling stars!

Happy Christmas!

31 Oct 2012

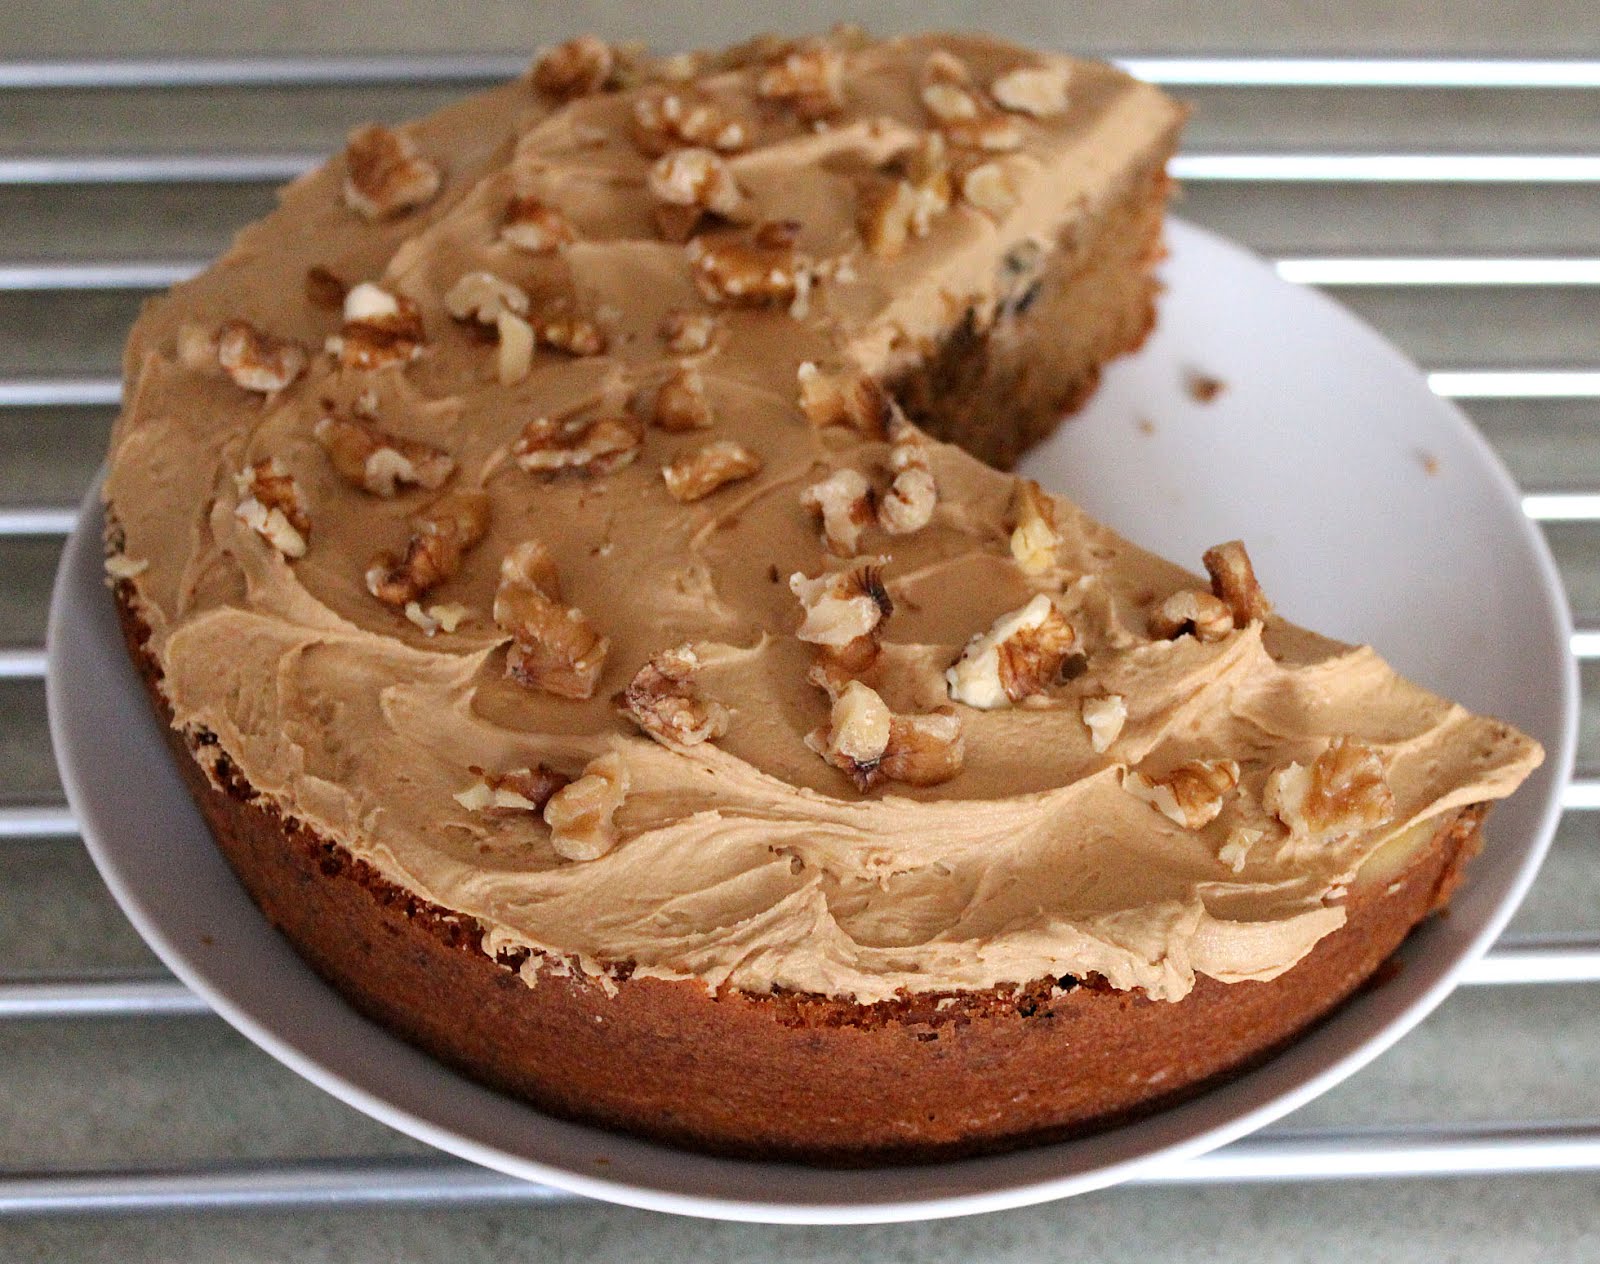
Coffee, Walnut and Raisin Cake - Recipe


I've always enjoyed coffee and walnut cake, and this recipe by Tana Ramsay from her book I Love to Bake! is perfect.  I particularly liked the addition of raisins and used huge plump raisins. It's best to dust the raisins with flour before stirring into the cake otherwise they may well sink to the bottom, which is exactly what happened to me.  I turned my cake over, and now the raisins are at the top of the cake, and I then happily slathered over the buttercream and sprinkled with chopped walnuts. I wasn't too sure about the coffee, walnut, raisin combo before I made the cake, but it works beautifully.

The cake doesn't need dressing up with a circle of neatly placed walnut halves, a scattering of walnut pieces is the way to go.  After all, the best dressed cake doesn't necessarily mean the cake is a winner.

Fortunately, not an overly sweet cake because the coffee butter cream is only on top, it is best not to be  tempted to cut it in half.  I used half the amount of butter cream suggested in the original recipe and found it was ample, and light brown sugar instead of caster sugar in the recipe, to give the cake more depth of flavour.

I've eaten the good, the bad and the disappointing coffee and walnut cake in coffee shops - this is the perfect coffee shop cake, it is moist, has a tender crumb, not too much topping and keeps well too. I cut mine into slices and popped it into the freezer and then kept going back to the freezer and taking out another slice, it is that good!  Hubby thought this was a great cake too, he isn't very keen on cakes buried beneath a mound of sweet buttercream, and he said the cake/buttercream ratio I used was perfect for him. Phew!

Many of the bakes in I Love to Bake! are cooked at 200ºC or 220ºC which is something to be aware of - the suggested temperature for this cake is 200ºC and the timing is 35 minutes - if I cooked a deep cake at this temperature my cake would burn, peak and the batter would be a horrible volcanic mass.  A few years ago I went on a Patisserie Course at the local college and they cooked everything, including cakes, at almost maximum temperatures. A Victoria Sandwich at college in commercial grade ovens cooked in 10 minutes!

Adapted recipe.

You will need:  a 20cm round cake tin 5cm deep (I used a springform tin), greased , floured and base lined with parchment paper.

For the sponge:

175g softened butter, 175g light brown sugar, 3 large eggs beaten, 3 tbsp room temperature milk, 175g sifted self-raising flour, 1 tsp baking powder, 2 tsp instant coffee granules dissolved in 1 tbsp boiling water, 80g walnut pieces chopped, 60g plump raisins dusted in flour.

1. Preheat the oven to 160ºC.
2. Beat the butter and sugar together until light and fluffy. Add the eggs and milk gradually whilst continuing to beat. Sift the flour and baking powder over and fold into the mixture. Stir in the dissolved coffee granules.
3. Pour the batter into the baking tin and bake for 30-35 minutes. If it isn't cooked through cover with foil and pop back in the oven for 10 minutes or until cooked. Cool the baked cake for 5 minutes, turn out onto a cooling rack.

For the topping you will need:

125g softened unsalted butter, 150g sifted icing sugar, 4 tsp instant coffee granules dissolved in 1 tbsp boiling water(cooled a little), 30g chopped walnuts.

1. Place the butter into a bowl and beat until soft, add the sifted icing sugar and the dissolved coffee granules. Beat with a mixer for 5/10 minutes until light and fluffy.
2. Spread the butter cream over the top of the cake and decorate with the chopped walnut pieces.