18 Dec 2016

Plum Frangipane Tart with Crushed Amaretti

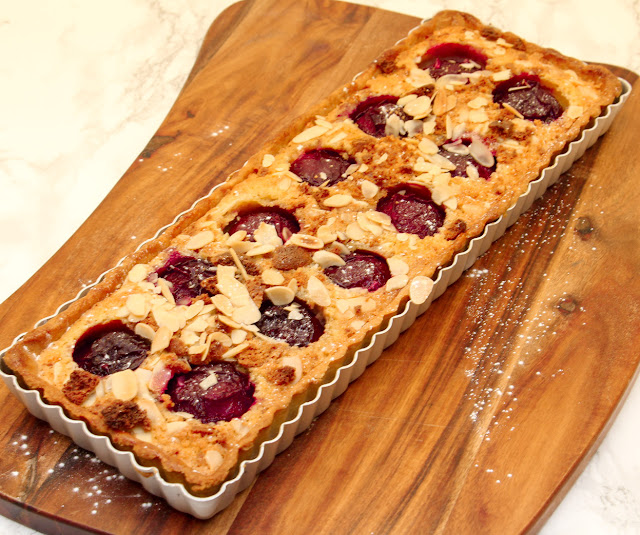
Plum Frangipane Tart

I bought these plums on a whim from the supermarket, they're what I call the dreaded 'ripen at home' which often translates to 'never will ripen at home'. Why do I do it? This time they were kind to me and ripened at home in a good 10 days after purchase without going mouldy which is a first.

Fortunately the plums were delicious, which is a blessing, especially after I had taken a fair amount of time making this fabulous tart which is topped with crushed Amaretti biscuits and flaked almonds.

I mainly buy Amaretti biscuits before Christmas and these together with flaked almonds make the most glorious crunchy topping for the ever popular frangipane bake.

A slice of plum frangipane tart with flaked almonds and crushed amaretti

Thermomix Instructions in Italics

You will need: Oblong tin deep fluted tart tin with loose base.35cmx10cmx3cm 

For the pastry:
175g plain flour, plus extra for dusting
75g cold butter, cubed
25g caster sugar
1 medium egg, beaten with a splash of water
For the filling:
75g butter, softened
75g caster sugar
2 eggs, beaten
75g ground almonds
2 tsp plain flour
½ tsp almond extract
6 plums halved and stoned
For the topping:
Crushed Amaretti biscuits
Flaked Almonds

1. Place the flour and butter in a food processor and whiz until the mixture resembles breadcrumbs. Add the sugar and mix in briefly, then add 3 tablespoons of the egg and water mixture. Whiz until the dough just comes together.
Place the flour, butter, sugar and 3 tablespoons of the egg and water mixture into the TM jug 20 Secs/Speed 4.
2. Chill the pastry for 30 minutes. Remove from the fridge and allow to come to room temperature. Roll the pastry out on a lightly floured surface and line the tin,
3. Preheat the oven to 190°C/170°C fan/ Gas 5 and place a heavy baking sheet inside on the oven rack to heat up.
4. Prick the base of the pastry all over with a fork, now chill in the fridge for 30 minutes.
5. Line the pastry case with crumpled baking paper and spread over a layer of baking beans. Bake for 10 minutes.  Remove from the oven and remove the baking paper and beans. Return the part baked pastry case to the oven for 10 minutes until light golden brown.  Leave the pastry case in the tin to cool on a rack.
6. Now make the frangipane filling by placing the butter and caster sugar into the food processor, whiz briefly.  Add the ground almonds, flour, eggs and almond extract. Whiz again until smooth.
Add the butter, caster sugar, flour, ground almonds, almond extract and eggs to the TM jug 1 min/speed 3.
7. Reduce the oven to 180°C/160°C fan/Gas 4.  Pour the frangipane into the tin,  Arrange the plum halves cut down side on top of the filling. Scatter over crushed Amaretti biscuits and flaked almonds.
Bake for 45 minutes until the tart is golden brown. Cool on a rack.

4 Dec 2016

Christmas Chocolate Marble Loaf Cake

Christmas Chocolate Marble Loaf Cake

Christmas is coming! Wrapping presents, writing cards, shopping all to be done but there's always time to bake an easy marble loaf cake. This cake is a childhood favourite and one I never tire of. It's an easy bake simply topped with a delicious chocolate icing and a few sprinkles, what's not to like.

The cake will be a winner with children.........

A slice of chocolate marble loaf cake

50g butter, softened
75g soft tub margarine
125g caster sugar
125g self-raising flour
1 level tsp baking powder
pinch of salt
2 large eggs
2 tsp orange juice
2 level tbsp cocoa powder

For the icing
50g unsalted butter
30g cocoa powder, sifted
2 tbsp milk
200g icing sugar, sifted
Decoration
25g white chocolate, melted
white chocolate stars

You will need: Greased 450g loaf tin lined.

Thermomix Method in Italics

1. Preheat the oven to 170°C. Line the tin with a wide strip of non-stick baking parchment to go up the wide sides and over the base.
2. Place the butter,  Stork SB, sugar, flour, baking powder,  pinch of salt, eggs and orange juice into a mixing bowl and beat with an electric mixer for two minutes. Spoon half the cake batter into another bowl.
Add the butter, soft tub margarine, sugar, flour, baking powder, pinch of salt, eggs and orange juice to the TM jug 20 Secs/Speed 5. Scrape down 5 Secs/Speed 5. Spoon half the cake mixture into a bowl.
3. Sift the cocoa powder into one half of the mixture and mix until evenly blended.
Sprinkle the cocoa powder over the cake batter in the TM jug - 10 Secs/Speed 5.
4. Spoon the plain and chocolate cake mixtures alternately into the loaf tin. Level the surface, swirl the cake batter gently with a skewer. Bake for approximately 40 minutes until well risen, and starting to shrink away from the sides of the tin.
5. Cool in the tin for 10 minutes, then turn out on to a wire rack, peel off the lining paper and leave to cool.
6. To make the icing, melt the butter in a small pan, add the cocoa powder, stir to blend and cook over a low heat for one minute. Stir in the milk and icing sugar, remove from the heat and mix thoroughly. Spread the cold cake with the icing, blob the melted white chocolate over the top and swirl with a skewer. Decorate with chocolate stars and leave to set.

27 Nov 2016

Leek, Mushroom and Cheese Quiche

Leek, Mushroom and Cheese Quiche

Quiche isn't just for the summer, it's fabulous with salad vegetables, home made coleslaw and chunky slices of crusty bread.

I used a mixture of Cheddar and Leicester cheese, I used to live in Leicestershire and so it follows that a piece of Leicester cheese can often be found in my fridge.

The blueprint for the filling is using 2 whole eggs and 300ml of dairy which should be double cream or creme fraiche.  Add to this the extras of your choice and voila you have a delicious quiche.

The pastry recipe is one I came across ages ago from chef Tom Kerridge, it's so easy to make and roll out that once you make this you'll use this as your turn to recipe.

225g plain flour, plus extra for dusting
140g cold butter, diced
1 tsp icing sugar
1 egg yolk
3tbsp cold water
For the filling:
1 leek, washed, sliced and chopped
100g mushrooms,sliced
75g Cheddar cheese, grated
75g Leicester Cheese, grated
2 eggs
300ml double cream
freshly ground pepper

You will need: 23cm loose base fluted tin 2.5cm deep

1. Whiz the flour, icing sugar, a pinch of salt and the butter in a food processor. and rub in until it resembles breadcrumbs. Add the egg yolk and 3 tbsp cold water, whiz to form a firm dough. Wrap in cling film and rest for 20 minutes in the fridge.
If you have a Thermomix: add everything to the jug and set to 20 secs/speed 5. Check everything is combined.
2. Preheat the oven to 200ºC. Roll out the pastry and line the tart tin. Cover with baking parchment and fill with baking beans. Cook for 20 minutes, then remove the paper and beans. Brush the pastry base with beaten egg and cook for 5-10 minutes more until the tart case is pale.
3. Turn the oven down to 160ºC.
4. Add a knob of butter to a frying pan, add the washed leeks and gently cook until tender. Remove from the pan and leave to cool.
5. Into a clean pan add a knob of butter, add the sliced mushrooms and cook until softened and tender. Remove from the pan.
6. Place a layer of leeks on the pastry base, followed by the grated cheese and sliced mushrooms. Season.
7. Mix the eggs with the double cream and pour over the filling.
8. Place the quiche into the oven and cook for 40 minutes until just set.
9. Remove from the oven and cool on a wire rack.

You may also like:
Cheese, Onion and Potato Quiche
Cheese and Onion Quiche
Leek and Gruyere Quiche

20 Nov 2016

Pressure Cooker Cottage Pie

Pressure Cooker Cottage Pie

New in the kitchen is an electric pressure cooker!  If you like me bought a stove top pressure cooker years ago and still have nightmares about all that soggy cabbage and worst of all beetroot juices coming from the weights and redecorating the kitchen then to revisit the pressure cooker can be a challenge.

I've made a few recipes now and using a new kitchen gadget can be a little daunting especially when you have memories of old regarding cooking foods under pressure.

An easy recipe of cottage pie is welcoming now the weather has changed and the beef layer took only 12 minutes to cook. I didn't get on too well though cooking the potatoes. I tried cooking them in a bowl but they resisted my attempts, I hadn't got one of those folding stainless steamer trivets so they didn't really stand a chance.  In a last ditch attempt I cooked the potatoes under pressure for 4 minutes but unfortunately if the potatoes are floury they will break up in the water.

A little update: I've just bought a small folding steamer which you sit onto the trivet supplied and the potatoes cooked in 8 minutes, I let the pressure come down naturally.  Perfectly cooked potatoes and ready to mash.  I should have mentioned that the mince beef and vegetables were cooked to perfection.

You can see from the photo that I broke the rules and put warm potato on top of a too runny mince beef layer which hadn't set and when I cooked the pie the potatoes melted into the beef - not great.

Cottage Pie

Anyway here is the recipe and when made correctly will taste and look amazing!

Note: Never thicken any recipe prior to cooking when using a pressure cooker otherwise it may run out of liquid and burn - always thicken afterwards!

Serves 4

1 tbsp olive oil
1 red onion
1 celery stalk
1 carrot
750g lean mince beef
300ml beef stock
1 tablespoon tomato puree
2 tbsp Worcestershire sauce
seasoning

For the potato topping:
750g potatoes
30g butter
seasoning

1. Finely chop the onion, celery and carrot. Set the pressure cooker to a low or normal saute and add 1 tablespoon of olive oil, cook the vegetables until the onion becomes translucent and the vegetables begin to soften about 5 minutes.. Add the mince beef breaking it up and cook for 5 minutes to brown, add the tomato puree and cook stirring for a couple more minutes.
2. Add the stock, Worcestershire Sauce, salt and pepper. Place the lid on and cook for 12 minutes. If there is too much liquid thicken with a thickening granules or beef gravy. Pour into a large casserole dish, cool slightly and place in the fridge to set.
3. In a clean pot add 250ml of water. Place the trivet in the pot and top with a stainless steel fold up steamer. Cut the potatoes up into small pieces and pressure cook for 8 minutes and let the steam release naturally. Remove the potatoes from the steamer and place in a large bowl, add the butter and mash until smooth. Season and cool.
4. Place dollops of the cooled potato onto the cooled and set mince mixture and spread out to the edges.
5. Preheat the oven to 180C and cook for 30 minutes until bubbling and brown.

You may also like:
Cottage Pie with Vine Tomatoes
Mince Beef and Stilton Pies
Spicy Mince Beef Bake

13 Nov 2016

Thermomix Light Brown Bread

Home Made Bread

There's nothing more satisfying than a loaf of home made bread.  On this occasion I used the Thermomix but the dough can easily be made in a bread machine or food mixer.

A flour I recently discovered at the supermarket is Cotswold Crunch which is a blend of strong white flour, malted wheat flakes and malt flour -  I mixed this with white strong flour to ensure the loaf of bread is lovely and light.

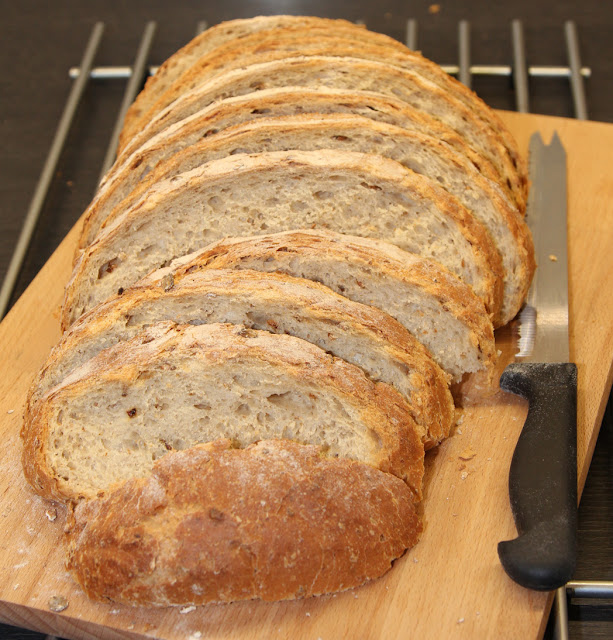
The bread bakes and cuts well and is the perfect accompaniment to cheese.

Sliced Seeded Bread

Conventional Method in Italics 

You will need:
350g white strong flour
150g Cotswold Crunch Flour
1 x sachet instant dried yeast
20g soft butter
10g salt
300ml tepid water

1. Tip the flour, instant dried yeast, butter, salt and water into the TM jug.
Place the flour, instant dried yeast, melted butter, salt and water into the bowl of the mixer.
2. Knead 6 minutes until the dough is elastic.
Place the dough hook on and knead for 10 minutes until smooth and elastic.
3. Leave the dough in the TM jug and let rise for 1 hour until double in size.
Oil a large bowl, add the dough, cover with cling film. Leave for approximately one hour until double in size.
4. Remove the dough from the jug and knock back. Shape into an oval.
5. Place the dough onto a floured tray, cover with oiled clingfilm and leave until double in size.
6. Preheat the Oven to 200°C.
7. Slash the bread three times with a very sharp knife.
8. Bake for 40 minutes until golden brown. Transfer to a wire rack to cool.

30 Oct 2016

How to Make Thermomix Blueberry Scones

Thermomix Blueberry Scones

It was about this time last year my thoughts turned to owning a Thermomix TM5. It's a huge eye-watering purchase but one I'm glad I made.  Ten months on I have no regrets, my only thoughts are it's always best to learn basic cooking before investing in a costly machine. I had high expectations when I bought mine and in return that it would exceed my expectations and thankfully I'm now well and truly hooked. I still like to use my other kitchen gadgets and hopefully a new exciting kitchen gadget is on the horizon so watch this space!

Anyway getting back to the scones, and especially blueberry scones which are one of my favourites, there are detailed Thermomix and conventional instructions below.

I rolled out the dough and scattered over the fresh blueberries........

Thermomix Scone Dough

After trying to fold the dough into three with fresh blueberries I think it would be far easier to use frozen fruit and simply poke them into the finished dough!

Folded blueberry scone dough

Now roll out the dough gently and fold again but this time with the fold the opposite way. Cut the dough out into rounds and brush with the remaining egg and buttermilk mixture.

Blueberry scones before baking

Conventional instructions in Italics

Makes: 8

You will need: A large floured baking tray and 5cm pastry cutter

200g Self Raising Flour
1 tsp baking powder
pinch of cream of tartar
50g salted butter, cubed
15g golden caster sugar
1 large egg
60g buttermilk
100g fresh or frozen blueberries

1. Preheat the oven to 230°C.
2. Mix the egg and buttermilk. Reserve a little for glazing the scones.
3. Add all the ingredients except the blueberries and egg/buttermilk mix to the TM jug.
Add the Self Raising Flour, baking powder, cream of tartar, pinch of salt and cubed butter to a large mixing bowl. Rub the butter into the dry ingredients until it resembles breadcrumbs.
4. TM20 Secs/Knead setting - pour the egg/buttermilk mix into the jug in a steady stream whilst checking to see if the dough has come together.
Stir in the caster sugar.and sultanas. Add most of the egg and buttermilk mix gradually to make a soft sticky dough.
5. Scrape down the TM jug.
6. If the dough hasn't come together now add a little more buttermilk to the jug TM10 Secs/Knead.
7. Remove the dough onto a lightly floured board and shape into a rectangle, don't worry if it's a little sticky the flour should take care of that. Scatter over the fresh blueberries.
8. Fold into three and gently roll out.
9. Now fold into three in the opposite direction.
10.Roll out to 1cm and using a floured 5cm plain round cutter. place onto the prepared tray. Brush the tops with the reserved egg and buttermilk mix.
11. Bake for approximately 12 minutes until well risen and golden.
12. Place the baked scones onto a cooling rack and cover with a clean tea towel.
13. Eat now spread with butter or freeze for later.

You may also like: 
How to make the perfect Thermomix fruit scones


23 Oct 2016

Plum Frangipane Traybake

Plum Frangipane Traybake

I bought the plums from Bridgnorth market last weekend, they were perfectly ripe, none of this ripen at home nonsense which basically means they go mouldy and never get to ripen.

A cake cum pudding is always a favourite here and the cake batter can all be mixed quickly in one bowl.

I made my own custard but hubby said Bird's custard is best with everything!

Plum Frangipane Cake with Custard
Unlike me don't forget to bang your tin down on the work surface a couple of times before baking
otherwise you'll end up with large air bubbles in your bake like above
I made the cake in my Thermomix (the instructions are in italics) conventional instructions are below. For best results make sure all the ingredients are at room temperature.

200g softened butter
200g caster sugar
3 large eggs, lightly beaten
250g self-raising flour
50g ground almonds
1tsp almond extract
2 tbsp milk
6 red plums, halved and stoned
25g flaked almonds

You will need: 30cm x 20cm x 3cm baking tin - greased and lined with baking parchment.

1. Preheat the oven to 180°C.
2. Add the butter, caster sugar, flour, eggs, almond extract, ground almonds and milk to the bowl of a stand mixer, beat for 2 minutes until smooth.
Place the butter, caster sugar, flour, eggs, almond extract, ground almonds and milk in the TM bowl Mix 20 Secs/Speed 5.  Scrape down and Mix 10 Secs/Speed 5.
3. Dollop the cake batter into the tin and level. Press the plums into the top of the cake mixture in rows cut-side up. Scatter the flaked almonds over the cake batter and plums. Bake for 40-45 minutes, until risen and golden.
4. Remove from the oven, place on a wire rack to cool before turning out. Sift icing sugar over the cake. Serve with custard or cream.
5. Cut into squares. Can be frozen, thawed and warmed in a microwave.

22 Oct 2016

Winter Puddings - Free ebook

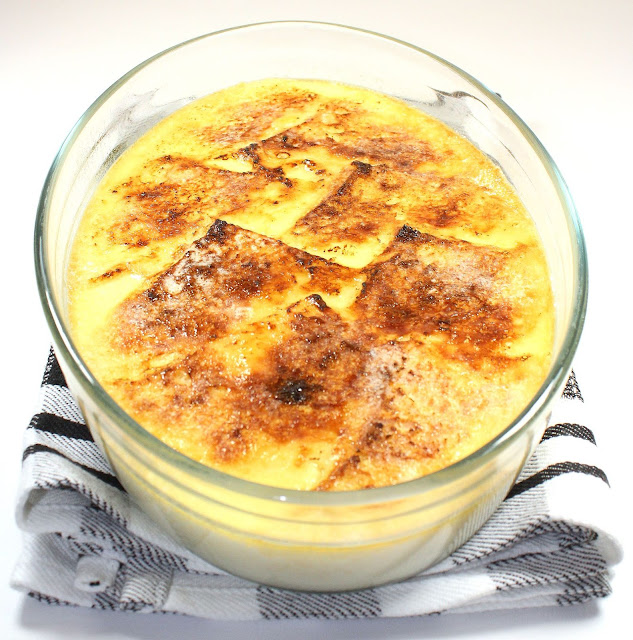
Posh Bread and Butter Pudding


It's that time of the year again when we turn to comfort food and delicious warming British puddings. Kitchen Delights has put together a free ebook of delicious recipes including a family favourite apple crumble, Bakewell tart with a crunchy iced topping, steamed lemon Pudding with mixed berry jam, baked apple and the above, only for grownups, luxurious bread and butter pudding with sultanas soaked in brandy!

The PDF is very quick to download here.

16 Oct 2016

Apple Frangipane Tart

Apple Frangipane Tart

Sometimes there isn't the time or inclination to make pastry and crushing a few biscuits to make a tart case is perfect. Anyway, who doesn't love bashing biscuits with a rolling pin.......

This is a luscious tart, easy to make and you'll be sure to go back for another slice.

A slice of apple frangipane tart

175g digestive biscuits
75g butter
200g Bramley apples
lemon juice
For the frangipane filling:
75g butter, softened
75g caster sugar
2 free-range eggs, beaten
75g ground almonds
1 tsp almond extract
50g flaked almonds

You will need: 20cm fluted loose-base round tin

1. Preheat the oven to 200°C.
2. Place the biscuits into a large jug and using the end of a rolling pin crush until fine crumbs.
3. Melt the butter in a small basin in the microwave, pour onto the crushed digestives, mix to coat the biscuits and tip into the tart tin.  Press the crumbs evenly over the base and sides of the tart tin. Place in the fridge to chill.
4. Add the butter and sugar  to a bowl and mix until light and fluffy. Mix in the eggs, now add the ground almonds and almond extract mix until well combined.
5. Peel and core the apples, cut into thin slices. Add a squeeze of lemon juice to help prevent browning. Arrange the slices over the biscuit base. Dollop the frangipane filling onto the apple slices and spread evenly. Sprinkle with the flaked almonds.
Bake for 20-25 minutes until golden and set.

You may like:
Apple Ginger Cakes with lemon icing
Nora's Apple Pie
Blackberry and Apple Crumble Tart


11 Sept 2016

How to Make the Perfect Thermomix Fruit Scones

Thermomix Rich Fruit Scones

Making scones in a Thermomix is totally different to using either your hands or a food mixer. The liquid content along with the other ingredients usually all go into the jug to be mixed at exactly the same time. It's a very strange concept compared to rubbing the butter into the flour and then adding the liquid cautiously until the correct consistency is achieved, but it's always far better to be cautious and add the liquid in a steady stream until you are happy with the dough.

I've tried a few scone recipes that have been especially written for the Thermomix but I've returned to my own favourite which I've converted for the Thermie. My recipe is a rich dough made with a mix of egg and buttermilk (for lightness) and it works for me! I'd definitely recommend using a straight sided cutter though, and not the crinkled cutter I used, because you'll get a far better rise.

Instructions for making the scones conventionally are included in the blog post too.

Step by step photographs........Instructions below 7 - 10

Scone Dough


Folded Scone Dough


Second folding of scone dough


Scone Dough Ready for the final rolling


Scones that have been cut out and tops brushed with buttermilk

Conventional instructions in Italics

Makes: 8

You will need:  A large floured baking tray and 5cm pastry cutter

200g Self Raising Flour
1 tsp baking powder
pinch of cream of tartar
50g salted butter, cubed
15g golden caster sugar
1 large egg
60g buttermilk
100g sultanas

1.  Preheat the oven to 230°C/Fan 210°C.
2.  Mix the egg and buttermilk. Reserve a little for glazing the scones.
3.  Add all the ingredients except the sultanas and egg/buttermilk mix to the TM jug.
Add the Self Raising Flour, baking powder, cream of tartar, pinch of salt and cubed butter to a large mixing bowl. Rub the butter into the dry ingredients until it resembles breadcrumbs. 
4.  TM20 Secs/Knead setting - pour the egg/buttermilk mix into the jug in a steady stream whilst checking to see if the dough has come together.
5.  Scrape down the jug.
6.  If the dough hasn't come together now add a little more buttermilk to the jug along with the sultanas TM10 Secs/Knead.
Stir in the caster sugar.and sultanas. Add most of the egg and buttermilk mix gradually to make a soft sticky dough.
7.  Remove the dough onto a lightly floured board and shape into a round, don't worry if it's a little sticky the flour should take care of that.
8.  Fold into three and gently roll out.
9.  Now fold into three in the opposite direction.
10.Roll out to 1cm and using a floured 5cm plain round cutter. place onto the tray. Brush the tops with the reserved egg and buttermilk mix.
11. Bake for approximately 12 minutes until well risen and golden.
12. Place the baked scones onto a cooling rack and cover with a clean tea towel.
13. Eat now spread with butter or freeze for later.

Note: On the sconeometer the Thermomix makes the most delicious scones!

You may also like these scone recipes:
Raspberry and Coconut 
In Search of the Perfect Scone
Fresh Berry

22 Aug 2016

Brioche Berry Pudding

Berry Brioche Pudding

I wonder if the Olympians can indulge in a pudding this week as a reward? Or maybe they are programmed never to go anywhere near sugar. For those of us who like an indulgent dessert/pudding this is one of my favourites because it is as light as a feather to eat, quick and easy to make and reheats quickly in the microwave.

All you need is a sliced brioche loaf, which I mostly buy from Aldi, berries of your choice, eggs, sugar, milk and a pot of whipping or double cream.

Slice of Raspberry and Blackberry Brioche Pudding

You will need: large buttered ovenproof dish

1 small sliced brioche loaf about 200g
75g fresh raspberries
75g fresh blackberries
250ml semi-skimmed milk
250ml whipping or double cream
3 medium eggs
25g caster sugar
1 tsp vanilla extract
Icing sugar for dusting

1. Preheat the oven to 190°C.
2. Cut off the crusts. Lay half the brioche over the base of a 1.5 litre x 6cm deep ovenproof dish. Sprinkle over half of the raspberries and blackberries, cover with the rest of the brioche squares. Scatter over the rest of the berries.
3.Whisk the milk, cream, eggs, vanilla extract and sugar together in a jug. Pour the egg mixture over the top of the brioche and leave to soak for 5 minutes.
4. Put the dish into a deep roasting tin and pour boiled water into the tin to come halfway up the sides of the dish. Bake for 30 minutes until puffed and golden. Remove from the oven and the tin. Leave to rest for 10 minutes, dust with icing sugar, serve on it's own or with whipped cream.


15 Aug 2016

Bread Made in a Banneton Proving Basket

Bread made in a banneton proving basket

Some time back I bought a banneton, it's been sitting in the cupboard waiting patiently for me to do some online research and get some use out of it.

The  first thing I found was that it has to be 'seasoned' otherwise the bread will stick for ever and a day. Here's how I did it - take a clean spray bottle and spray the inside of the banneton. Now dust the inside with cornflour. Hold the banneton by it's edge and keep on turning it round until the inside is coated and the excess falls onto the work surface. Leave to dry.

My first attempt was a bit rubbish but not to be outdone I had another breadmaking session and whilst I'm not saying it's perfect, I was more than a bit chuffed with my attempts.

Bread which has been baked until black and slashed to within an inch of it's life with intricate patterns adorn galleries on Instagram and whilst I may have bread envy I'm more than happy with my efforts.I decided against slashing the bread in case the dough deflated, maybe next time..... At least the dough came out!

Sliced bread made in a banneton

Instructions are for making in a stand mixer - Thermomix instructions in italics

7g sachet easy-blend yeast
or 15g fresh yeast
500g strong white bread flour, plus extra for dusting
2 tsp salt
1 tsp sugar
2 tbsp olive oil
300ml lukewarm water

You will need: round banneton which has been well floured and the excess tipped out.

1. Tip the flour into a mixing bowl. If using easy blend dried yeast, stir this into the flour. For fresh yeast, crumble it and rub into the flour  Add the salt and sugar.
Add the fresh yeast (defrosted to room temperature if previously frozen) to the jug with the water 2 min/37°C/speed 1.
2. Mix the oil into the 300ml lukewarm water and pour into the dry ingredients.
Now add the olive oil, salt and flour. Knead 4 minutes.
3. Fit the dough hook to the stand mixer. Mix on a slow speed for 10 minutes until smooth and elastic.
4. Tip out the dough onto an oiled silicone mat. Shape into a round and place into a greased bowl. Cover with oiled clingfilm and leave in a warm place for 1 hour until double in size.
5. Remove the risen dough from the bowl and knock back until smooth.  Shape into a round and place upside down in a floured banneton.  Cover with clingfilm and rise for 30 minutes in a warm place.
6. Preheat the oven to 200°C.
7. Perhaps not a conventional way to remove the dough from the banneton but my way - place a piece of baking paper over the risen dough, take a baking sheet and place over the baking paper, tip over and the dough should come away easily.
8. If you wish slash the bread with a very sharp knife and bake for 40 minutes until cooked through and brown. Transfer to a wire rack to cool.


31 Jul 2016

Thermomix Seeded Bread Rolls

Seeded Bread Rolls on a baking tray

Bread making in the Thermomix is so easy and homemade bread is one of my life's pleasures.  I'm never going to knead and pummel bread dough by hand it's just too hard work and I like to let one of my kitchen gadgets do all the hard work.

I made these bread rolls with fresh yeast and here again the Thermie comes into it's own.  Using fresh yeast can sometimes be a faff but all you have to do is put the fresh yeast along with water into the jug and in a couple of minutes time it's lukewarm and mixed perfectly for the next stage. I asked at the bread counter for my yeast and then broke it into 20g pieces, wrapped them in clingfilm and popped them into the freezer for another day. When you want to make bread simply thaw still wrapped in the clingwrap.

Some recipes recommend kneading in the TM for 2 minutes but I find 4 minutes is perfect to get to the windowpane stage.

After mixing and kneading all you have to do is turn the jug upside down, twist the handle away from the base and the blade falls out with the dough.

Seeded bread dough

Divide the dough into 12 and shape into bread rolls.

Seeded bread rolls before proving

Cover the rolls in clingwrap and prove until double in size. Brush the rolls with water and sprinkle with seeds.

Bread rolls after proving

There's nothing quite like seeing a cooling rack adorned with freshly baked bread rolls.

Seeded bread rolls cooling down

Conventional Method in Italics

Thermomix Recipe (slightly adapted)

Makes: 12

20g olive oil
small sprig of fresh rosemary
300g water
20g fresh yeast
1 tsp salt
500g strong white bread flour
100 g mixed seeds

You will need: a large shallow baking tray

1  Place the sprig of rosemary into the olive oil to infuse. Lightly flour the tray. Add the fresh yeast (defrosted to room temperature if previously frozen) to the jug with the water 2 min/37°C/speed 1.
Rub the yeast into the flour.
2  Remove the sprig of rosemary from the olive oil. Now add the olive oil, salt and flour.  Knead 2 minutes. Add 80g of the seeds and using knead setting 2 minutes.
Measure out the water and heat to tepid. Make a well in the centre of the flour. Pour in the water, olive oil and salt. Place the dough hook onto the stand mixer and mix on slow until a dough forms. Continue kneading on a medium speed for 8 minutes until smooth. Add the seeds and continue kneading for another 2 minutes until the seeds have been worked in. Or alternatively, remove the dough from the mixer, add the seeds and knead them in by hand.
3 Turn the dough out onto a silicone mat. Break the dough into 12 equal pieces. Arrange the rolls onto the floured tray.  Cover loosely with greased clingfilm and leave to rise until double in size. Brush the tops gently with water and sprinkle with the remaining seeds. Preheat the oven to 200°C.
4  Bake the rolls 20-30 minutes until golden and risen. Transfer to a wire rack to cool.


24 Jul 2016

Summer Berry Tarts

Mixed berry tarts with lemon curd

The shops are full to the brim with summer berries and what better way to use them than a simple pastry tart topped with a lemon mascarpone filling, adorned with berries and blobs of luscious lemon curd.

Unfortunately my raspberries haven't done so well this year, my strawberry plants have done okay but need replacing next year, as ever my redcurrant bushes are bursting with little red berries.  Redcurrant bushes look after themselves so why the berries cost a fortune in the shops is a complete mystery to me.

Summer Berry Individual Tarts
The tarts still look pretty without lemon curd

Instructions for Thermomix pastry - food processor instructions in italics.

You will need: 6 x 10cm tins with a loose base, greased

225g plain flour
110g unsalted butter, cubed
pinch of salt
40g caster sugar
1 egg yolk
2/3 tbsp cold water

For the filling:
250g light mascarpone cheese
lemon curd

Decoration:
Mixed fruits of your choice

Food processor instructions in italics

1. Add the flour, butter, sugar and salt to the bowl - Turbo a few times to turn into crumbs. Now add the egg yolk and water. Turbo until just mixed together. Only add more water if necessary to get the dough to cling together.
Add the flour, butter and sugar to the bowl of the processor. Pulse until fine crumbs. Add the egg yolk and water, pulse until the dough starts to come together.
2. Remove the dough from the bowl and form into a flat disc. Cover in clingwrap and refridgerate for 30 minutes.
3. Divide the dough into six and roll out on a lightly floured board. Place the rolled dough carefully into the tins.  Prick the base, place the tins onto a baking tray and chill for 30 minutes.
4. Preheat the oven to 180ºC conventional.
5. Place squares of baking paper into each tin and fill with baking beans.
6. Bake in the oven for 15 minutes, remove the paper and baking beans. Return to the oven for another 10 minutes.
7. Place the baked pastry cases onto a cooling rack.
8. Add the mascarpone cheese into a bowl and beat until smooth.  Add lemon curd to taste, mix and place in the fridge to chill.
9. Place dollops of lemon mascarpone cheese into the cooled baked pastry cases, top with berries and blobs of lemon curd, if you like.

You may also like:
Summer Berries Pavlova
Berry Meringue
Mixed Berry and White Chocolate Cheesecake Slice


19 Jul 2016

Salad Bowl Recipe

A Salad bowl with avocado

One of the things I like about a salad bowl is that you can keep adding to it and it's also a great way to have a fridge clear.

If you enjoy looking at Instagram the hashtag #powerbowl and #saladbowl are inspirational and Pinterest is another great source where you're sure to get salad bowl envy. My only comment though is that the bowls are nearly overflowing and there appears to be enough food in them for breakfast, lunch and dinner!

There's no recipe as such - my salad consists of a base layer of mixed leaves, an oven cooked breast of chicken lightly coated in piri piri spices. Bulgar wheat with diced peppers and raisins, cherry tomatoes, cucumber, peppers, julienned carrot and courgettes. Lightly toasted pine nuts and a handful of sunflower seeds.

Mix a dressing of your choice to pour over the salad and lastly add a few slices of sliced avocado.

quick and easy salad bowl

We've just returned from a week away in Caernarfon, North Wales - this holiday we decided to rent a cottage overlooking mountains and coast. Salads were a great way to feed ourselves without spending too much time in the kitchen.

I'm missing this fabulous view from the holiday cottage already and I've only been home for a few days!

View in North Wales

Back soon!


3 Jul 2016

Thermomix Lemon Drizzle Loaf Cake

Lemon Drizzle Loaf Cake

I've now learnt how to make cake successfully in a Thermie in 25 seconds and all you need to do is add everything to the jug and whiz, it's like magic, and no more curdled cake batter. My food processor makes cake in less than a minute, the stand mixer takes 2 minutes and I find they all give the same result. To be fair none of us need all this kitchen gadgetry to produce a cake and occasionally I use a wooden spoon and bowl which gives me some satisfaction to feel more 'hands on' when I bake.

I'm not sure that I should be making and eating cake after over indulging on holiday but I find lemon drizzle irresistible and after all there was a lemon in the fridge crying out to be used. I also add a dash of lemon extract and the zest to the cake batter for a wonderful hit of lemon.

Note: These ingredients and method are written specifically for the Thermomix TM5. To make in a food processor add all the cake ingredients to the processor bowl and whiz until just combined. For the stand mixer place everything in the bowl and mix for 2 minutes until smooth.

Ingredients:
180g granulated sugar (caster sugar if using a food processor or stand mixer)
180g self raising flour
180g softened unsalted butter
pinch of salt
3 large eggs
1 tbsp lemon juice
1 tsp lemon extract (optional)
zest of 1 lemon

For the icing:
50g icing sugar
3 tsp lemon juice

You will need: 900g loaf tin lined

1. Preheat the oven to 180ºC.
2. Add the sugar to the TM bowl and grind 20 Seconds/Speed 8.
3. Add the flour, salt, softened butter, eggs, lemon juice, lemon extract and zest to the bowl. TM 20 Seconds/Speed 5.
4. Scrape down the sides of the bowl.  TM 5 Seconds/Speed 5.
5. Pour the cake batter into the lined loaf tin and bake for 40 minutes - test with a cake tester to ensure the cake is cooked through.

Just baked lemon drizzle loaf

6. For the icing: Mix the icing sugar and lemon juice together leave to stand whilst you poke holes in the top of the hot cake.  Drizzle the icing over the cake hot cake which gives a crunchy topping. Leave the cake in the tin to cool on a cooling rack.

Icing poured over hot cake

7. Once cold can be frozen in slices.

You may also like:
Thermomix Banana Cake
Pecan Sponge Squares
Plum and Pear Slice


27 Jun 2016

Easy White Bread Rolls Recipe

Cheese and Beetroot Cob

I've been away on holiday to the wonderful island of Madeira, we had amazing food at our hotel and I especially loved the vast choice of desserts but now it's back to every day home cooking and salad, salad and more salad!  I made these bread rolls before I went away on holiday.

I used to live in a small market town in Leicestershire and one of the things we ate regularly at home was a cob filled with Leicester cheese and topped with a few slices of home made pickled beetroot and a grinding of black pepper. It's still a firm favourite now and if you can find time to make your own bread and cook up some beetroot it takes lunch to another level. I must write a blog post showing how easy it is to cook beetroot using a steam oven, trust me it saves getting everything covered in beetroot juice, and if you've ever cooked beetroot in a pressure cooker you will know where I'm coming from!

The bread dough was made in my Thermomix but I've included instructions for using a stand mixer too, the rolls are easy to make and are wonderfully soft, light and fluffy, this is a recipe I use time and again. I always use Waitrose Canadian White Strong Bread Flour because I've found it consistently gives me the best result.

Easy White Bread Rolls

Thermomix Instructions in Italics

Makes: 12

500g strong white bread flour
5g fast-action yeast
10g salt
35g butter
300ml warm water

1. Put the flour into the bowl of the mixer and using the appropriate attachment rub in the butter.
2. Add the yeast and salt to the bowl, it's always best to place them on opposite sides of the bowl.
Add the flour, yeast, salt and butter to the jug Turbo x 3 times.
3. Fit the dough hook and pour in 300ml of warm water, knead for 5 minutes until the dough is elastic.
Pour 300g warm water into the jug Knead Function/4 minutes.
4. Remove the dough and place into a greased bowl, cover with cling wrap and prove for an hour or so until doubled in size.
Prove the dough in the TM jug, cover with cling wrap, leave until double in size about 1 hour.
5. Remove the dough from the bowl, return to the stand mixing bowl and using the dough hook knead for a minute to knock out the air.
Remove the dough from the TM jug and knock out the air.
6. Cut the dough into 12 even size pieces and shape into balls.  Place onto floured baking sheets. Dust with flour and cover with a tea towel to prove until double in size.
7. Preheat the oven to 210ºC. Place the baking sheets into the oven and bake for 15-20 minutes until golden brown. Place on a wire rack to cool.

More Bread Recipes:
Malted and White Bread Rolls
Apricot Couronne
Fougasse


11 Jun 2016

How to Sous Vide In The Oven


My first attempt to sous vide without any fancy kitchen gadgets....I used a digital ovenproof thermometer, deep ovenproof casserole, large freezer bag with a zip (try the bargain shops), round cooling rack, bulldog clips and a straw.

I took inspiration from online searches and asked hubby to help me. Temperatures and timings can be found at ChefSteps (a link is at the end of this posting).  I cooked my joint for 6 hours which produced meat which was medium but I think 4 hours would have been sufficient.

I did find it all a bit of a faff but the end result made it all so worthwhile. The meat was a silverside joint I bought from Asda when it was on offer, for our time we were rewarded with a really tender joint without shrinkage and it didn't dry out. The downside is that you have to sear the meat in a pan after it's cooked and this process fills the kitchen with smoke, or alternatively browned using a blow torch otherwise the outside looks anaemic, unappetising and the meat will lack in flavour.

Beef being prepared for sous vide
Experimenting before buying expensive gadgetry is a great way to try before you buy.  Sous vide machines have a huge footprint and some are the size of a microwave or there are alternative sous vide cooking aids that you can buy.

I used a fan setting at 110 deg C and let the oven heat up and stabilise for a good half an hour prior to cooking. The rolled 1kg silverside joint is seasoned and placed into a strong ziplock freezer bag.  It's good practise to turn down a third of the bag to the outside when placing the meat inside the bag to help eliminate bacteria.

This is where the faff begins.....Place hot water from the tap to half fill the large deep casserole. Now boil the kettle and add some of this to the casserole, using your digital thermometer you are looking for 60 deg C.

Taking the air out of the bag using the water displacement method is to simply place the open bag into the water and the air is automatically released from the bag, close to a straw width and then making sure you don't suck up any meat juices suck out the remaining air and close the bag.

Beef joint being placed in casserole for sous vide

Place the rack on top of the casserole, using bulldog clips attach the bag to the top of the cooling rack, ensure that the bag does not touch the casserole.

The rack and bulldogs for sous vide oven cooking

Being extremely careful place the casserole into the oven.  Top up with hot water checking it is 60 deg C.

Testing the water temperature in the casserole

Place the probe of the digital thermometer into the water and attach using a bulldog clip, ensuring that it is reading the temperature of the water and not in contact with the casserole, close the oven door.

Digital temperature thermometer probe attached to the rack of a casserole for sous vide cooking

Adjust the oven temperature to keep the water to 60 deg C. My oven temperature setting initially needed to be 110 deg C but then tracked down to range between 65 deg C and 75 deg C I used fan for efficiency, but once it settled down I didn't have to keep an eye it was quite happy at 85 deg C.....but all this for me was a faff but hubby seemed happy enough checking the temperature.

The oven set up for sous vide

The meat doesn't look very pretty when you remove it from it's water bath but you get all those lovely meat juices to make your gravy, just be sure to pour these through a sieve and you are left with tasty meat juice.  Here is a blog post How to use juices from the bag after sous vide braising explaining why it is necessary to sieve the meat juices before making a sauce.

Cooked beef after being cooked sous vide in the oven

NOTE:
I used ChefSteps Time and Temperature Guide
For the water displacement method ChefSteps Simple Sous Vide Packaging
A must read: How to Cook Food Perfectly and Cheaply with a DIY Sous Vide Machine
An interesting read: How to sous vide in the oven with or without water

Disclaimer: Other oven brands are available but #boughtformebyme. Please be sure to do your own research if you are using this method regarding temperatures and timings because I take absolutely no responsibility for anyone reading this post and falling ill!