Showing posts with label Sweet. Show all posts

22 Oct 2016

Winter Puddings - Free ebook

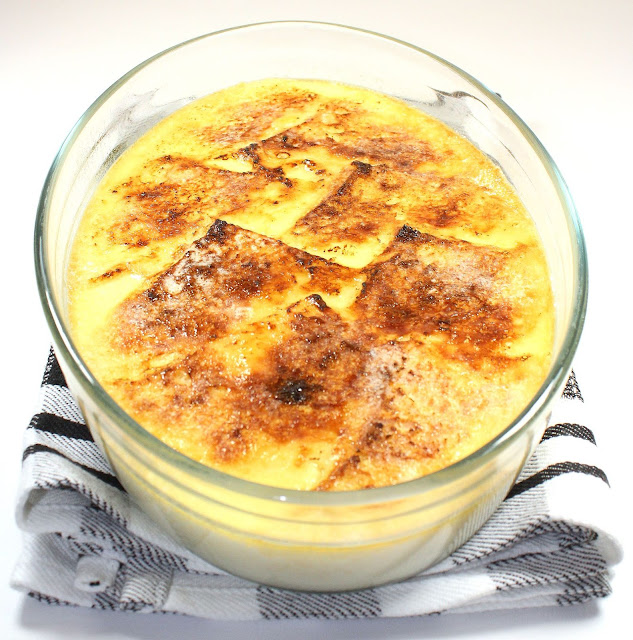
Posh Bread and Butter Pudding


It's that time of the year again when we turn to comfort food and delicious warming British puddings. Kitchen Delights has put together a free ebook of delicious recipes including a family favourite apple crumble, Bakewell tart with a crunchy iced topping, steamed lemon Pudding with mixed berry jam, baked apple and the above, only for grownups, luxurious bread and butter pudding with sultanas soaked in brandy!

The PDF is very quick to download here.

16 Apr 2014

Easter Egg Cupcakes - Recipe

Easter Egg Cupcakes with Smashed Eggs
The blogosphere is on overload with Cadbury Creme Eggs recipes, but alas I'm not a fan of the Creme Egg.  The photographs and recipes I've seen though are enough to make me wish I was a Creme Egg fan.

I've used my favourite chocolate filled eggs because I'm happy that I can decorate my cakes and eat the eggs at the same time.

I made some of the cupcakes in muffin cases and others in a friand tin.

Makes: 12 chocolate cakes
You will need: 150g softened unsalted butter, 150g caster sugar, 150g self-raising flour, 1 teaspoon baking powder, 25g cocoa powder, 3 eggs

1. Line a 12 hole muffin tray with paper cake cases. Put all the ingredients in a bowl and beat for 2 minutes. Divide the mixture among the cases.
2. Bake in a preheated oven, 180°C for 20 minutes until they are risen and just firm to the touch. Transfer the cakes to a wire rack to cool.

Chocolate Fudge Icing

You will need: 25g unsalted butter, 15g cocoa powder, 175g icing sugar, 2/3 tablespoons of milk.

1. Melt the butter in a small saucepan. Stir in the cocoa powder and cook, stirring for about 30 seconds until smooth. Remove the pan from the heat and gradually stir in the icing sugar and milk, mixing until smooth.
2. Return to the heat for 1 minute, stirring until it has a glossy pouring consistency, if it is too thick add a teaspoon of milk. Quickly spread the icing over the cakes whilst it is still warm. Top with mini eggs.

8 Apr 2014

Raspberry Cheesecake - Recipe

No bake Mini Raspberry Cheesecake
These were supposed to be called raspberry rippled cheesecakes but my rippling wasn't great.  I've always liked cheesecake but I haven't made a cheesecake for some time now and these mini cheesecakes were really lovely and remind me of warm days. I used a silicone muffin tray which makes turning them out easy.

I'm suffering from 'writers block' and my posts are a 'little to the point' at the moment, hopefully I'll find something interesting to say in future posts - maybe I should say I fell into the raspberry canes in my fruit patch whilst picking the raspberries but I have to admit the raspberries came from the freezer cabinet in Waitrose!

Do you prefer bake or no bake cheesecake? I would be really interested to know.

Will they freeze?  I have no idea - they didn't get as far as the freezer but I can't see
a reason why they shouldn't freeze and thaw successfully.

Makes: 6 in a regular size silicone muffin tray or 12 in a silicone mini muffin tray

Ingredients:
55g butter
115g crushed digestive biscuits
3 tbsp water
2tsp powdered gelatine
150g raspberries + extra to decorate
2 tsp lemon juice
3 tbsp caster sugar
zest of 1 lemon
150ml double cream
150ml ready made custard
freeze dried raspberries to decorate

Method:
1. Melt the butter and add the crushed digestives. Place the silicone tray onto a metal tray. Divide the biscuit mixture between the six holes. Press the biscuit mixture down with the back of a spoon.  Place the tray in the fridge for an hour.
2. Place the water into a heatproof bowl, sprinkle over the gelatine, leave on one side for 5 minutes.
3. Puree the raspberries, then press through a plastic sieve to remove the seeds.
4. Place the bowl of gelatine in a saucepan of gently simmering water and heat for 5 minutes, stirring until the gelatine is a clear liquid.
5. Pour the cream into a bowl and whisk to soft peaks.  Fold into the custard with the grated zest of a lemon and the sugar.  Stir 1½ tablespoons of the gelatine into the raspberry puree and fold the remainder of the gelatine into the custard and cream mixture.  Pour the mixture into the muffin moulds.  Place blobs of the raspberry puree on top and taking a skewer swirl the mixtures together. Chill in the fridge for a few hours to set.
6. Remove the cheesecakes from the moulds and decorate with extra raspberries and freeze dried raspberries.


15 Feb 2014

My New Steam Combination Oven and a Parsnip Soup Recipe


I like parsnip soup, hubby doesn't like parsnip soup.  It isn't a problem though because I freeze the surplus away either in soup bags or in muffin trays for a lunchtime standby.

It seemed a good idea at the time to try using my steam oven to make the soup - it turned out to be a waste of time.  The whole point of kitchen gadgets is to get the best from them and not to try using them if it is going to take you longer than it would without them.

I spent a rainy Saturday afternoon, grating parsnips and onions in the food processor and adding them to the oven tray.....


I added some of the stock, all of the spices and cooked the parsnips and onions........


The parsnip cooked but would that onion cook - no!  It took ages to get the onion to cook.  It wasn't the easiest of things to get onion, parsnip and chicken stock from a flat tray to a liquidiser to puree.

I'm not implying in any way that my steam oven is disappointing but it's more sensible to use gadgets for stuff they are good at.  In this case using a saucepan on the hob would have been the better option. Fortunately after all this I was rewarded with a glorious bowl of soup.

Here is the recipe and method using a hob.

40g butter
1 onion
700g parsnips
1 tsp curry powder
1/2 tsp cumin
1.2 litres chicken stock
freshly ground salt and pepper
150ml semi-skimmed milk
paprika

Serves:  6

1. Peel and chop the onion and parsnips.  Melt the butter in a large pan. Add the onion and sweat gently for 5 minutes taking care not to colour the onions.  Add the parsnips to the pan and fry for a few minutes.
2. Dry fry the cumin seeds gently in a pan until they release their aroma.  Grind in a pestle and mortar. Add the cumin and curry powder to the pan and cook for a few minutes.
3. Add the chicken stock and seasoning to the pan and bring to the boil. Reduce to a gentle simmer, cover and cook for 30 minutes or until the vegetables are tender.
4. Cool, transfer to a blender and puree until smooth.
5. Add the puree to the pan, add the milk and reheat gently.
6. Serve into bowls and sprinkle with paprika.

A few more things I experimented with using the steam function which should be useful if you are upgrading your kitchen and thinking about purchasing a steam combination oven.

Steamed puddings are a huge success.......
Lemon and Blueberry Steamed Pudding and
Christmas Pudding
Sliced potatoes and frozen peas cook really well
Prepared veg ready for steaming         
Steamed new potatoes and chantenay carrots
There is a useful steam reheat function which successfully reheated the vegetables shown in the right hand photograph.  However, I boiled the cabbage because it wouldn't steam successfully.

The reheat function will magically refresh bread......

My panettone looks like it has just been freshly baked - the reheat function is really useful
Purple sprouting broccoli doesn't steam successfully,
 however, tenderstem broccoli steams perfectly
Back soon with more highs and lows using a steam combination oven.....


27 Sept 2013

Apricot Couronne - The Great British Bake Off

Apricot Couronne
Last weekend, before the 'Sweet Dough Week' was on television,  I had a go at making the Apricot Couronne by Paul Hollywood.

At least I had the full instructions in front of me, unlike the contestants who have to work through a few scant notes and are seriously under pressure.

I gave myself three hours to make the bread and it was ample time to make, prove, bake and decorate. When I placed my buttery filling of apricots, raisins and walnuts onto the dough and rolled it up like a swiss roll the dough seemed to stretch and have a mind all of it's own. Another observation, I didn't allow a large enough centre, although in the photograph it looks as though there isn't a gap in the centre, I'm pleased to say that there is! The icing was a little runny, it's drizzled over the couronne whilst it's warm and this makes the icing lovely and crunchy.

The couronne is fairly easy to make and would be a fabulous bake for the Christmas season.  It's rich, sticky, tender and delicious.  The bread kept happily for a couple of days under clingwrap.

To sum up, it took three hours to make, we ate it three times a day (well there were only two of us to get through it) and it took us three days to polish it all off!  Although I say it myself, I was quite pleased with my first attempt at making this recipe......

The recipe can be found on the BBC Food website.

21 Sept 2013

Individual Pineapple Tart Tatin - Recipe

Pineapple Tart Tatin made with fresh pineapple
Today we have had glorious weather and it's looking like we are going to get some more late summer sunshine. Hubby happily cooked a barbecue and I made these lovely fresh pineapple tart tatin for dessert. They are delicious served with ice cream for that lovely hot/cold dessert which always works so well.


Sometimes caramel can be a pain to make and for reasons unknown won't play and I managed to get toffee instead which is no bad thing because my husband loved it.  I find the best way to make caramel is to use a small saucepan, which I forgot to do, and used a frying pan which seemed to give problems.

The pineapple rings sitting on top of the set caramel
The 'what's that' in the top right of the photograph is my clever apple corer, which is a great kitchen gadget and I've had this for many years, it's very useful for taking the cores out of pineapples too.

It's best to make a few slits in the pastry lids
My caramel and pineapple tried to burst out of the tins whilst cooking and next time I'm going to make some slits in the pastry.

I hope you have a go at making this delicious dessert.......

Serves:  4 people:

You will need:  4 x deep individual tart tins

4 x 2cm slices of ripe pineapple
50g caster sugar
cube of butter
4tsp rum
375g puff pastry

1.   Roll out the pastry - cut out four circles slightly larger than the tops of the tart tins.
2.   Remove the core from the centre of the pineapple slices, this is easily done with an apple corer.
3.   Take a small saucepan and add the sugar to the pan.  Set over a medium heat until it turns golden brown, add the butter, let it melt and bubble.
4.   Pour into the four tins and place in the fridge until set.
5.   Take a pineapple ring and place on the top of the caramel.
6.   Spoon a teaspoon of rum into the centre of each pineapple ring.
7.   Take a pastry lid and place over the pineapple and with the help of the handle of a teaspoon, tuck the pastry edges in to encase the pineapple.  Make a few slits in the pastry lids.  Place in the fridge for 30 minutes.
8.   Meanwhile, preheat the oven to 200oC.
9.   Place the tarts onto a baking tray and place in the oven for 25 minutes or until golden.
10. Leave to cool for 15 minutes.  Run a knife round the tins and place a plate over the tin and turn upside down.  Beware the caramel can still be hot and it is safest to use a tea towel to help you remove the tins.
11. Serve with ice cream.


8 Jun 2013

Strawberry and Chocolate Cupcakes: Recipe


I've eaten more chocolate this year because the winter went on and on, I'm not a chocolate snob, but a bar of Lindt Excellence Strawberry Intense Dark Chocolate is hard to beat. The chocolate has pieces of freeze dried strawberries running through, it smells of summer and reminds me of strawberries dipped in chocolate.

The strawberries for the cupcakes were bought but it
shouldn't be too long before I am picking my own strawberries
For the vanilla cupcakes:

Makes: 9 cupcakes

You will need: 12 hole muffin tin lined with 9 cupcake cases

115g softened butter, 115g caster sugar, 2 eggs, 115g self raising flour, 1 teaspoon baking powder, 1 teaspoon vanilla essence.

1. Preheat the oven to 180ºC.
2. Place all the ingredients into a bowl and beat together with an electric mixer for two minutes.
3. Spoon into 9 cupcake cases and bake for 25 to 30 minutes. Cool.

For the vanilla buttercream:

You will need:

175g softened unsalted butter, 350g sifted icing sugar, 1 tsp vanilla extract.

1. Beat the butter in a bowl to soften. Add the icing sugar gradually, add the vanilla extract, and beat until the icing is very smooth and pale in colour which will take 5 minutes using a stand mixer.

To decorate:

I used a 1M icing nozzle to pipe the buttercream. Cut a square of chocolate in half and place on the buttercream, top with a whole strawberry.

More recipes you may like:
White Chocolate Raspberry Cupcakes
Chocolate Covered Coffee Beans Cupcakes
Mini Strawberry Victoria Sponges

Photographs taken using the Nikon D3200.

21 Apr 2013

Sticky Toffee Pudding with Ginger: Recipe

Sticky Toffee Pudding with Toffee Sauce and Ice Cream
There are many variations of Sticky Toffee Pudding, and here is yet another, but this time with a ginger twist.  If dates aren't your thing, a pudding studded with stem ginger may well entice you towards making this rich and delicious pudding.

The pudding is really light in texture and the outer crust is sticky. I decided to use a toffee
sauce recipe using evaporated milk, it's more lightweight than using double cream and I promise the sauce doesn't taste of 'evap'.

A fabulous recipe by Mary Berry from her book Mary Berry's Family Sunday Lunches.

I served mine with ice cream because I like hot puddings with a dollop of cold ice cream.......
Slightly adapted recipe.

Serves: 6-8 people

You will need:  greased and base lined baking tin measuring 26cm x 19cm.

75g soft unsalted butter, 150g light brown sugar, 2 large eggs, 175g self-raising flour, 1tsp bicarbonate of soda, 2 tbsp black treacle, 1 tsp vanilla extract, 125ml milk, 4 bulbs stem ginger in syrup chopped finely.

1. Heat the oven to 180ºC.
2. Place the softened butter and sugar into either a food processor or mixing bowl and beat until it is light and fluffy.
3. Add the eggs, flour, bicarbonate of soda, treacle, vanilla extract and milk - whisk or whiz until smooth and thick.
4. Pour into the baking tin, bake for 35 - 45 minutes until cooked.
5. Cool in the tin for 10 minutes, turn out onto a baking tray.
6. Cut into slices - after cooling the pudding can be frozen or to reheat place on a plate and microwave for 30-40 seconds to reheat.

Sauce:
60g unsalted butter, 150g demerara sugar, 1 tbsp golden syrup, 150g evaporated milk

For the sauce: 
1. Melt the butter in a small pan.
2. Add the sugar and golden syrup to the butter.
3. Stir until the sugar dissolves.
4. Pour in the evaporated milk.
5. Beat until boiling.

To Serve:
1. Reheat a slice of pudding in the microwave for 30-40 seconds on high.
2. Pour the hot sauce over the pudding.
3. If you wish, serve with either a dollop of ice cream or some fresh cream.

For more of my yummy puddings:
Syrup Sponge
Plum, Rhubarb and Apple Crumble
Vanilla Rice Pudding with Blackberries & Plums
Brioche & Butter Pudding


16 Apr 2013

Bakewell Tart: Recipe


Traditional shortcrust pastry topped with raspberry jam. An almond sponge layer topped with crunchy icing and a scattering of oven toasted flaked almonds - bliss. There are many variations of this delicious tart and this recipe gives a nod to the Bakewell Tart but I'm sure it is far removed from the secret recipe used by The Bakewell Tart Shop in Bakewell, Derbyshire.


You will need:

20/23cm loose bottom flan tin

For the pastry: 250g plain flour, 50g butter, 50g lard, 3 tablespoons chilled water

For the filling: 125g softened butter, 125g caster sugar, 3 eggs, 125g ground almonds, 3 tablespoons unsweetened raspberry jam

To decorate: 50g sifted icing sugar, 1 tablespoon water, 25g flaked almonds

Method:

1. Preheat the oven to 200ºC. Sift the flour into a mixing bowl, rub in the fat until the mixture resembles breadcrumbs. Stir in the water to make a dough, if it doesn’t come together add more water. Knead to make a smooth dough and wrap in clingfilm. Chill for 30 minutes.
2. Roll out the pastry on a floured surface, line the tin and dock the pastry. Take a piece of baking paper, scrunch up, place into the pastry case, and fill to the top with baking beans. Bake blind for 15 minutes; remove the baking paper and baking beans.
3. Take a bowl and beat together the softened butter, caster sugar, the beaten eggs and ground almonds until smooth.
4. Spread the jam over the base of the cooked pastry case. Pour the cake batter over the jam to cover. Bake for 30-35 minutes.
5. Add the sifted icing sugar to a bowl and mix with water to make a thin pouring consistency and spread over the tart whilst still hot. Scatter over the flaked almonds, return to the oven for 5 minutes.

Links to previous postings:
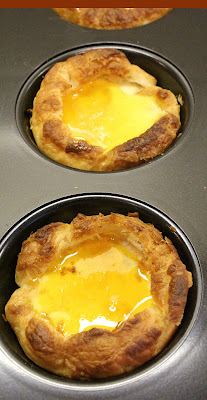
Quick Portuguese Tarts
Apple & Pear Crumble Tart
Pear & Almond Tart with Chocolate Sauce
Blackberry & Apple Crumble Tart

12 Feb 2013

Pancakes With Fresh Orange Juice


Pancakes served with orange is a puzzle to those who have never heard of this or always use freshly squeezed lemons.  I'm never sure, do you put juice on the pancake first and then sugar, or is it the other way round?

This is how I have eaten my pancakes since I was a child. I originally come from Melton Mowbray in Leicestershire, I'm not sure if this is the traditional way to serve them in Melton Mowbray or indeed Leicestershire.

Listening to the afternoon presenter on Radio Shropshire he has said for a few days now that he has always eaten pancakes with orange juice and he too comes from Melton Mowbray.

Upon a little internet research there is an article regarding pancakes on the bbc.co.uk/Leicester information pages and one of the photographs shows an orange being squeezed over a pancake. They also suggest filling pancakes with pork pie, Stilton Cheese and Red Leicester, not sure about this suggestion though!

I always use Delia's recipe because I love the lace effect the pancake produces - I hope you try this way of serving pancakes next time you feel a pancake moment coming on.  Children love oranges squeezed over pancakes and it is far kinder to them than using lemon juice.

10 Nov 2012

Quick Portuguese Tarts - Jamie's 30 Minute Meals

A few weeks ago I went on holiday to Madeira, and as usual when I am away from home, I like to experience local cakes and pastries, especially sitting outside a cafe on a fabulous sunny day. Cinnamon is a popular ingredient used in cakes and pastries - apple and cinnamon cake, banana and cinnamon cake and Portuguese Tarts, to name a few.  There were quite a few happy cake and pastry tastings, together with far too many cups of amazing coffee.

Whilst Jamie's Quick Portuguese Tarts aren't the same as we were served in Madeira, the filling is light, the orange caramel topping is superb and I could quite happily have eaten the lot!

I didn't cook these against the clock, I can't do it, won't do it - otherwise we end up with car crash food.

There are plenty of great recipes in the book, although if you wish to cook only one of the suggested meal plans the method layout can be frustrating.

I hope you have a go at making these delicious tarts.


2 Jun 2012

Diamond Jubilee Strawberry Crumble Crunch


The recipe for the  Heston Blumenthal Diamond Jubilee Strawberry Crumble Crunch can be found on the Waitrose website or you can watch the recipe video.

My recommendation is to make this in individual pots, because it looked a bit messy on the plate when I served it up.

Enjoy the holiday - back soon!

31 May 2012

Recipe: Jubilee Queen of Puddings


Queen of Puddings is a British Classic, and to celebrate the Queen's Jubilee the pudding was adapted.  Cherries Jubilee was invented for Queen Victoria's Diamond Jubilee. I decided to take this idea, and spread a layer of Cherries Jubilee on the pudding base.  I only hope the Queen doesn't mind that I messed about with a classic pudding, otherwise it could be the Tower for me.....

This pudding never looks the prettiest when served up, but a tip is to serve the pudding when it is lukewarm, this way the custard base has a chance to set again. For presentation, individual puddings win every time. No piped meringue, simply dollop the whisked egg whites into the centre, spread out towards the edges of the dish and swirl with a spoon. 

Serves:  4-6

For the pudding:

90g fresh breadcrumbs, 2 tbs soft brown sugar, 450ml whole milk, 1 lemon(zest only), 1 tbs caster sugar, 25g salted butter, 3 large eggs(yolks only, the whites will be used for the meringue)

For the topping:

350g jar pitted cherries ( I buy mine from Lidl), 2 tbs sugar free cherry jam, 1 tsp brandy, McDougalls Thickening Granules. 3 large egg whites, 75g caster sugar

1. Preheat the grill to medium setting.  Sprinkle the breadcrumbs and brown sugar onto a roasting tray and mix together.  Grill the breadcrumb mix until the breadcrumbs are lightly toasted.  Put on one side to cool.
2. Preheat the oven to 150°C/300°F/Gas 2.
3. Heat the milk, lemon zest, sugar and butter together in a pan over a medium heat. Stir until the butter has melted and the mixture is combined.  Stir the toasted breadcrumbs and caster sugar into the milk mixture.  Put to one side to cool for 30 minutes.
4. After the breadcrumb mixture has cooled for 30 minutes, whisk the egg yolks in a bowl until pale and fluffy, add them to the milk and breadcrumb mixture and whisk until combined.
5. Pour the pudding mixture into a 20cm ovenproof serving dish and bake in the oven for 50-60 minutes until the pudding has risen and set.
6. Drain the cherries(reserve the juice), add to a small saucepan, stir in the cherry jam and two tablespoons of the reserved syrup.  Heat gently until the jam has melted, add a teaspoon of thickening granules and stir until thickened, add the brandy. Cool slightly. Spread over the pudding layer.
7. Whisk the egg whites until the soft peak stage, add the sugar a little at a time whilst still whisking.  Continue to whisk until the mixture is glossy and stiff peaks form.
8. Spoon the meringue over the pudding and return to the oven for 40 minutes until the meringue is golden brown.

5 May 2012

Plum, Rhubarb and Apple Crumble


I am enjoying reading The Hairy Bikers' Big Book of Baking and trying out a few of the recipes.  The television series to accompany the book has finished and I am really going to miss watching it every week.  They made me smile:)

This recipe is taken from the book and is called Slovakian Fruit Crumble, but I have adapted it.  I definitely can't call it Slovakian Fruit Crumble now.

The mix of plums, rhubarb and apple is really, really good, and is a mix of fruits I can recommend you try.  I popped my fruit mix into a bowl and cooked them in the microwave for a few minutes to start cooking them - I am pleased I did this otherwise I think some of the fruit wouldn't have cooked through. 


Serves: 6

4 ripe plums, 1 large apple, 6 stalks rhubarb, 6 tbsp caster sugar, ½ tsp cinnamon, juice of  ½ lemon.

Crumble Topping: 175g Plain Flour, 1 tsp Baking Powder, ½ tsp allspice, 5 tbsp demerara sugar, 1 tsp cinnamon, 80g diced butter.

1. Grease a large ovenproof dish. Preheat the oven to 200°C/Fan 180°C/Gas 4.
2. Halve and stone the plums. Peel, core and dice the apple. Chop the rhubarb.
3. Put the fruit into the ovenproof dish and mix with the sugar, cinnamon and lemon juice.
4. Make the crumble: Put the flour, allspice, sugar and cinnamon into a large bowl and mix together, add the cubes of butter and rub in until the mixture looks like large breadcrumbs.
5. Scatter the crumble mix over the fruit and cook for 20-30 minutes until the fruit bubbles, the topping is golden and check the fruit is cooked.

30 Apr 2012

Mini Carrot Cakes

I think it is a given that I love kitchen kit and gadgets. A new addition to my bakeware collection is my 12 cup loose-based mini sandwich tin from Lakeland. I had only just purchased it at full price when I saw them advertising it in the sale - just my luck. The tin has push out bases and you can remove the cakes easily without damaging them.  If you grease the tin with Cake Release the cakes will come out very easily. 

You can make lots of mini sweet treats in this tin, and in one of their mini brochures that come with a million other brochures inside my Sunday magazine, I saw this recipe for mini carrot cakes. I adapted the recipe and used only half the walnuts suggested and replaced them with raisins. The cakes get lovely and sticky after a day or so and although mine didn't make the freezer, I can't see any reason why they shouldn't freeze successfully.

You will need:  150g plain flour, 1 tsp bicarbonate of soda, 1 tsp baking powder, 1/2 tsp all spice, 150g light brown sugar, 250 grated carrots, 50g finely chopped dried apricots, 50g finely chopped walnuts, 50g raisins, 150ml vegetable oil, 2 beaten eggs, 1/2 tsp vanilla extract.  

Lemon cream cheese icing:  50g butter, 75g full-fat cream cheese, ¼ tsp vanilla extract, 100g sifted icing sugar, 1 tsp lemon curd.

1.   Preheat the oven to 180°C and grease the tin, preferably with Cake Release.
2.   Sieve - flour, bicarbonate of soda, baking powder and all spice.
3.   Add to a mixing bowl.
4.   Stir in the sugar, carrots, apricots, walnuts and raisins.
5.   Pour in the vegetable oil.
6.   Add the eggs and vanilla extract.
7.   Beat until combined.
8.   Scoop into the tin.
9.   Bake for 30 minutes until risen and set.
10. Leave in the tin for 5 minutes.
11. Turn out onto a wire rack to cool.
12.  Make the filling:
13.  Beat the butter.
14.  Add the cream cheese, lemon curd and vanilla extract.
15.  Stir in the icing sugar and mix.
16.  Slice the cakes in half.
17.  Spread with the cream cheese filling.
18.  Dust with icing sugar.

21 Jan 2012

Nigella Lawson's Chocolate Brownie Bowls


To make this recipe you really need to buy the 6-cavity dessert shell tin. The recipe is from Kitchen by Nigella Lawson, it's just a shame Nigella didn't include a few more recipe variations because baking tins can be quite expensive and using them for one recipe isn't ideal.

I greased my tin with Wilton Cake Release to make sure the brownie bowls didn't stick to the tin and would turn out easily. Next time I make them I'm going to use cake release and then dust the tin with cocoa powder to see if this gives the base of the bowls more eye appeal.

An easy recipe to make and the cooking time is only 12 minutes. They turn out easily, can be frozen and reheat successfully in the microwave.

I made a chocolate sauce to fill my bowls (this isn't a Nigella recipe) and topped them with vanilla ice cream. Nigella says to eat the bowls warm and and then top them with ice cream. It just remains for me to say, delicious!

You will need:

125g unsalted soft butter, 125g caster sugar, 15g malted milk powder (Horlicks or similar), 15g best-quality cocoa powder, 125ml boiling water, 125 buttermilk or runny plain yogurt, 1 egg, 1 teaspoon vanilla extract, 150g plain flour ½ teaspoon bicarbonate of soda

1. Preheat the oven to 200°C/Gas 6 and either butter or use Cake Release to grease the tin.
2. Melt the butter over a low heat, add the sugar, keep stirring with a wooden spoon to dissolve the sugar into the butter. Take off the heat.
3. Put the cocoa powder and malted milk powder into a basin and whisk in the boiling water, whisk until smooth and there aren't any lumps. Add this to the warm pan of butter and sugar, stir well to combine.
4. To a basin add the buttermilk or yogurt, egg and vanilla and whisk together, stir this mixture into the pan. Whisk in the flour and bicarb.
5. Pour the mixture into a jug and fill the 6 bowls.
6. Place in the preheated oven for about 12 minutes. When cooked they will feel slightly bouncy if you press on the surface - sit the tin on a wire rack for 5 minutes before turning out the little brownie bowls. Fill whilst still just warm or when cooled.

The bowls can be baked up to a day ahead and stored in an airtight container, layered with baking parchment. Reheat in a warm oven for 5-8 minutes before serving. I found they reheated well in the microwave oven.
The bowls can be frozen, layered with baking parchment, for up to 2 months. Defrost for 3-4 hours on a wire rack at room temperature. Reheat.

Chocolate Sauce

You will need: 25g butter, 142ml double cream, 75g good quality dark chocolate broken into small pieces, splash of brandy, rum, Amaretto or Baileys.

Place the butter in a pan with the cream and bring to the boil. Turn off the heat and add the chocolate pieces to the pan. Stir, leave for 5 minutes for the chocolate to melt into the cream. Add a splash of either brandy, rum, Amaretto or Baileys.

5 Jan 2012

Brioche and Butter Pudding

A while back, I started the National Collection of Bread and Butter Pudding Recipes:) and to date, there are six other recipes on my site. Admittedly, some people find them problematic, but the secret is to make them well, and definitely not to have the obligatory burnt fruit on top (perhaps as some of our Mum's did), to do so is not only a crime against bread and butter pudding but a punishment of the highest order for the person who has to eat it.

This recipe is by the talented food writer, Tamasin Day-Lewis. The sultanas have been soaked in water and then drained, which prevents them from burning. It's always best to cook any bread and butter pudding recipe in a bain-marie because this will prevent it overcooking and take the humble bread and butter pudding to another level of fabulousness. Bread and butter pudding cooked to within an inch of it's life is horrible and years ago, before I learnt the error of my ways, I too have been guilty of this. I always check to make sure the pudding isn't overcooking by poking a hole in the top - as in the photograph. The custard will carry on cooking after it comes out of the oven and you will have a creamy custard sauce.

I have adapted the quantity of sugar used and the amount of apricot jam glaze. If I hadn't, the pudding would have been sugar overload. Presentation would have been better if I had used the tops of eight brioche rolls instead of using four brioche rolls sliced horizontally.

Adapted recipe for those on the 'No diet, diet' and to be fair I did use semi-skimmed milk and reduced the quantity of sugar. Who wants to diet in January anyway? I need proper food when it's cold, grey and miserable outside.

Serves: 4

You will need: 300ml semi-skimmed milk, 300 double cream, 1 split vanilla pod, 2 eggs, 2 tbsp vanilla sugar, 25g unsalted butter, 4 brioche rolls sliced horizontally into four, a handful of sultanas soaked in warm water until plump, few teaspoons apricot jam.

1. Preheat the oven to 170°C/Gas 4.
2. Pour the milk and cream into a saucepan. Scrape the seeds from the vanilla pod with the tip of a knife. Add to the pan along with the scraped pod. Bring almost to the boil and then remove the pan from the heat.
3. Whisk the eggs and sugar together thoroughly in a large bowl. Pour in the milk and cream mixture, firstly removing the vanilla pod, and whisk.
4. Melt the butter and brush it over the brioche slices, placing them into a greased pudding dish. Sprinkle with the sultanas.
5. Strain the milk and egg mixture over the top.
6. Place the dish in a roasting pan. Pour in enough boiling water to come halfway up the sides of the dish. Bake for 30 minutes or until just set and not over-browned.
7. Put the jam in a basin and add a teaspoon of water, melt gently in the microwave.
8. Brush generously over the eggy surface of the pudding.

Any pudding left over will heat up successfully in the microwave.

23 Nov 2011

Gordon Ramsay's Apple & Pear Crumble Tart


A perfect tart for Christmas! With notes of ginger, cinnamon and nutmeg - apples, pears, a delicious layer of almond frangipane, crisp pastry and a crumble topping.

I'm not too happy about sweet pastry when you have lot's of sweetness in a recipe, it's just too much and sugar overload. A well made shortcrust pastry base, baked blind until crisp is my preferred method.

I can't see any reason why this tart shouldn't freeze successfully, it can be sliced into portions when it is fridge cold and then put in the freezer. It also heats up successfully in the microwave. The tart is a real winner and will feed a crowd too. Simply serve with ice cream or pouring cream.

Gordon Ramsay has given us some fabulous recipes for desserts and this apple, pear and almond frangipane tart with a crumble topping is amazing.

The recipe is what I call high faff but it can be made in stages to lighten the faff element. I used my dicing gadget to make perfect dice of apples and pears because my knife skills are too clumsy to do this and I would probably end up in A&E!


Serves: 8

You will need: 34cm x 11cm oblong tin greased.

Filling: 4 Braeburn apples peeled and diced, 4 pears peeled and diced, a large pinch of ground ginger and cinnamon, a grating of nutmeg, 25g butter, juice of half a lemon.

Crumble: 160g unsalted butter, 2tbsp soft brown sugar, 150g plain flour, 80g demerara sugar, 25g roasted chopped hazelnuts.

Almond Frangipane: 50g butter, 50g icing sugar, 1 egg, 10g flour, 50g ground almonds.

Pastry: 220g plain flour, 50g lard, 50g butter, 3tbsp cold water

1. For the pastry: Put the flour, lard and butter in a food processor, blitz until breadcrumbs, add the cold water and process until the mixture comes together. Tip onto cling film, form into a flattened circle. Cover with clingwrap and chill in the fridge for 30 minutes.
2. Roll out the pastry, line the tin and bake blind using Delia's method.
3. To make the frangipane: Cream the butter and icing sugar together, slowly mix in the egg, flour and ground almonds. Chill for 2 hours before using.
4. To make the filling: toss the diced fruit in lemon juice to stop them browning. Take the fruit and mix with the spices. Heat a knob of the butter until foaming, then add the fruit and toss for about 30 seconds. Add the soft brown sugar and cook until the fruit is soft, but not broken down. Cool.
5. To make the crumble: Rub the remaining butter into the flour and stir in the demerara sugar and hazelnuts. Fill the tart with the frangipane, then fruit, and top with the crumble mix.
6. Heat the oven to 180°C/fan 160°F/Gas 4. Bake for 30 minutes or until golden brown.

13 Nov 2011

Christmas Individual Fruit and Grand Marnier Trifles

These trifles are easily put together and all you need is a bag of frozen berries from the freezer and you are part way to assembling a delicious trifle. The recipe is fairly low fat but is easily tweaked, bought custard can be used instead of making it yourself, also whipped cream can be used instead of the yogurt. Mr W and I enjoyed this low fat trifle and surprisingly didn't miss using cream for the topping.

The original recipe was fruit overload (as in the photograph), and in this instance you can definitely have too much of a good thing. You can never have too much Grand Marnier though.

Serves: 4

For the custard:
3 free-range egg yolks, 25g caster sugar, 1dsp cornflour, 300ml semi-skimmed milk, dash vanilla extract.

For the trifle:
4 slices of Madeira cake or trifle sponges, 4 tablespoons Grand Marnier, 200g mixed half thawed frozen berries, 200g Organic Greek Style Yogurt, 3tbsp sifted icing sugar, 1tsp vanilla extract, few extra berries to decorate.

1. For the custard: mix together the egg yolks with the caster sugar and cornflour. Heat the milk in a pan and when it is hot stir into the egg mixture, then pour into a clean saucepan and stir over a moderate heat until thickened. Add the vanilla extract, pour into a bowl and cover the clingfilm to prevent a skin forming, leave to cool.
2. Put the cake slices in the bottom of each glass, then drizzle over the liqueur. Divide the berries between them, then whisk the custard again and spoon over the berries and cake. In a separate bowl, mix together the yogurt, sugar and vanilla then spoon over the top. Leave in the fridge for the flavours to get to know each other. Decorate with a few extra berries.

1 Nov 2011

Christmas Chocolate Cupcakes


It's coming up to that time of year again! These happy little men are surrounded by snow and a dusting of silver glitter.

The cream cheese frosting makes a welcome change from the usual buttercream and pipes really well. If you find the frosting is a little soft just pop it into the fridge covered for a few minutes to firm up. Don't be tempted to use anything other than full fat cream cheese, I used Philadelphia, or you won't be able to pipe the swirls.

Makes: 12 cupcakes

You will need: a twelve hole muffin tin lined with muffin cases.

For the cupcakes:

100g self raising flour, 125g softened butter, 125g caster sugar, 2 medium eggs, 2 tablespoons milk, 3 level tablespoons cocoa powder

1. Preheat the oven to 180°C.
2. In a bowl beat together the butter and sugar until light and fluffy. Beat in the eggs and milk, fold in the sifted flour and cocoa powder until the mixture is smooth.
3. Divide the mixture between the cases and bake in the centre of the oven for 20-25 minutes until cooked.
4. Cool in the tins for 10 minutes then transfer to a wire rack.

Cream Cheese Frosting


200g Philadelphia Full Fat Cream Cheese at room temperature, 400g sifted icing sugar, 70g softened butter.

1. Simply mix all the ingredients together until light and fluffy.
2. Pipe swirls on top of the cupcakes.