Showing posts with label Coffee. Show all posts

20 Apr 2017

Coffee and Walnut Traybake Recipe

Coffee and Walnut Traybake


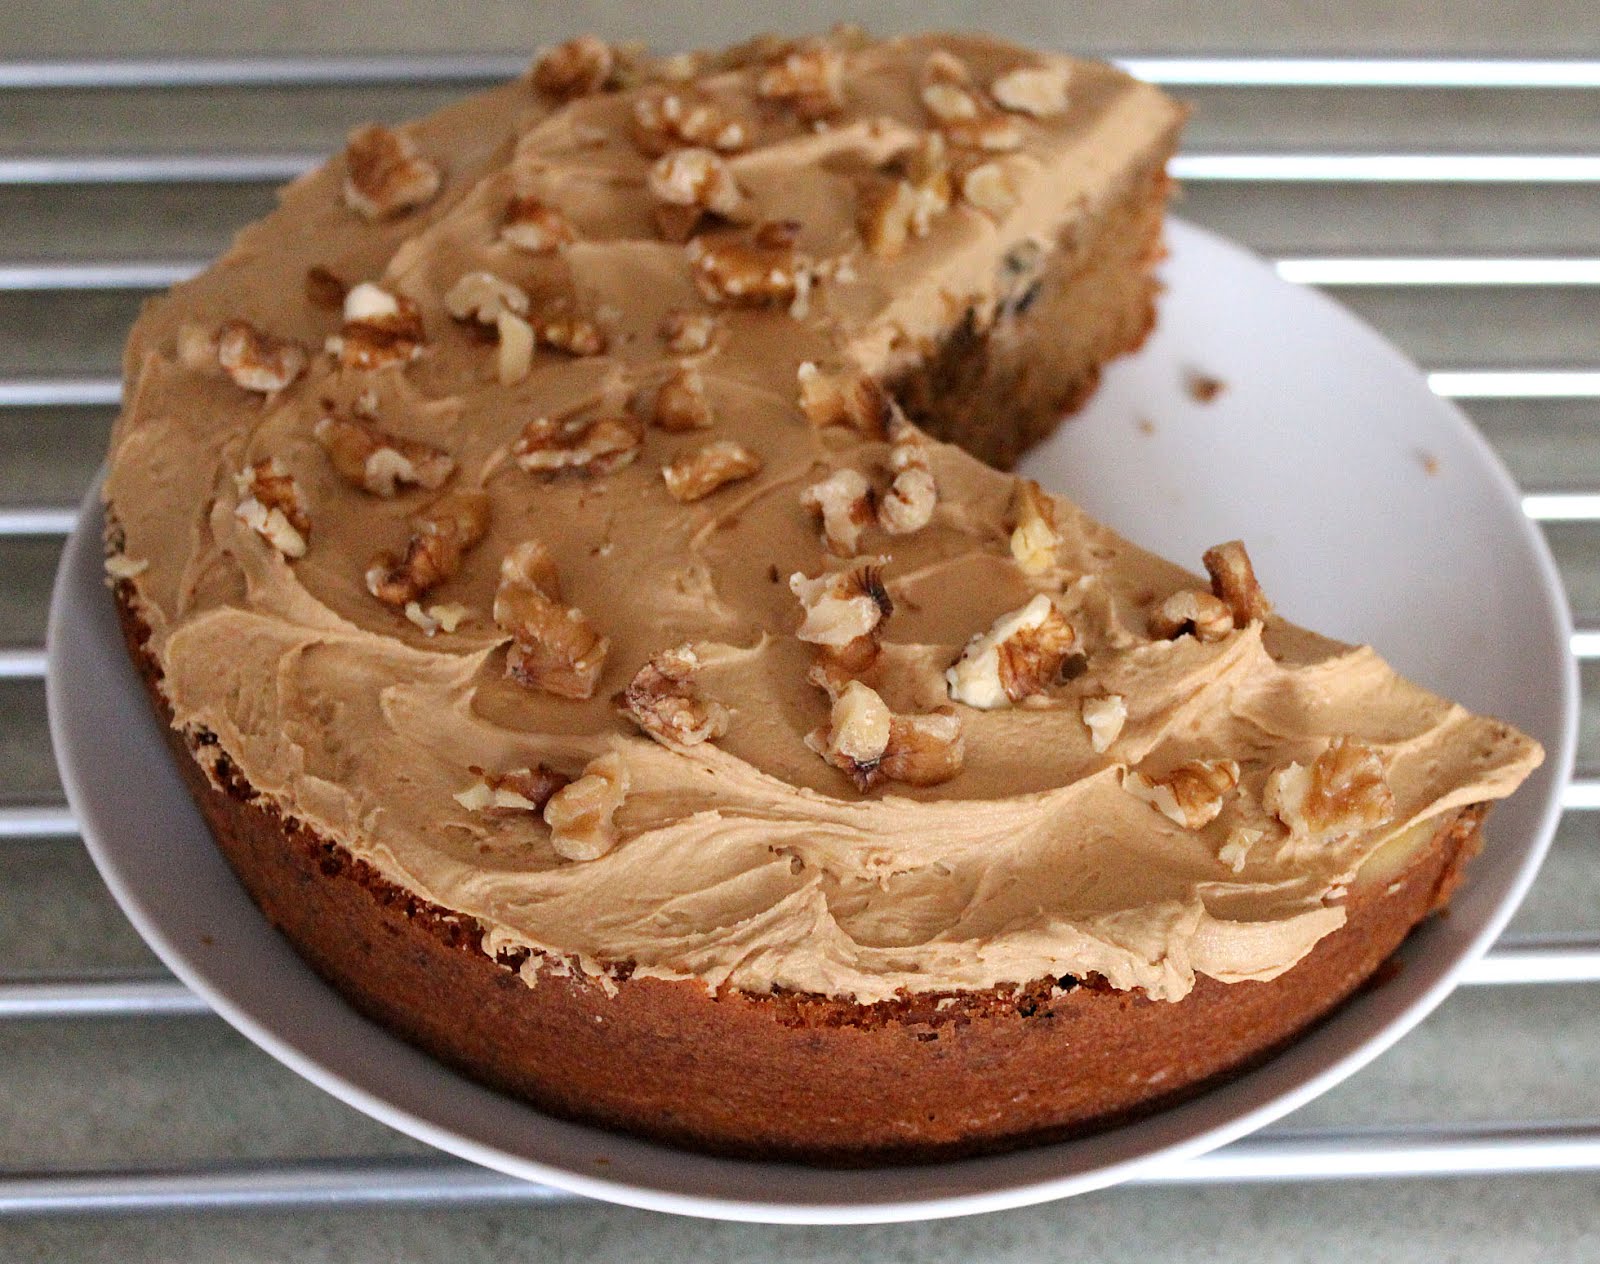
Coffee and walnut cake is a flavour combination made in heaven and for a coffee lover like me, it's win win!

A classic cake that shouldn't be messed around with too much and one, that for me, still has it's place in a coffee shop, regardless of how 'too cool for school' they are.

I've made this cake with instant espresso powder which can be found at the supermarket, the cake is made with a mixture of butter and margarine which produces a lighter sponge.

11 Jul 2015

Cappuccino Cake

Cappuccino Cake

I made this cake just before my holiday, it's quick and easy to make using the never fail all-in-one method. It was hastily photographed and my photograph doesn't really do this delicious cake justice....I'm playing catchup now with the blog posts and with a safety net of only a few in draft to fall back on, I may have to resort to sharing my holiday snaps with you!

This is basically a moist coffee cake with the addition of cocoa powder, the topping is white chocolate, butter, milk and icing sugar. I gave my two cake testers a slice each without telling them what the cake was called or the ingredients I'd used and they both thought it tasted of hazelnut. Interestingly the coffee/chocolate combo appears to confuse the taste buds!

If you own an induction hob the icing ingredients can be melted gently in a pan on the hob instead of over a pan of water.

You will need:  28cm x 18cm tin fully lined to come above the edges of the tin.

225g Stork SB
225g self raising flour
1 tsp baking powder
1 tsp cocoa powder
225g caster sugar
4 eggs
3tbsp coffee granules,
dissolved in 2 tbsp hot water

For the icing:
115g white chocolate (I use Menier because it melts easily)
55g softened butter
3tbsp milk
175g icing sugar

1. Preheat the oven to 180°C.
2. Sift the dry ingredients into a large bowl, add the butter, caster sugar, eggs and coffee mix.  Whisk for 2 minutes.
3. Pour the cake batter into the lined tin.
4. Bake for 35 minutes or until cooked.
5. For the icing: Add the chocolate, butter and milk to a bowl set over a saucepan of simmering water, stir until the chocolate has melted.
6. Remove the pan from the heat and sift in the icing sugar.  Beat until smooth. Spread over the cake quickly.
7. Dust with cocoa powder and when the icing is set cut into squares.
8. Freezes superbly.
9. Eat with a fabulous cup of coffee.


14 Dec 2014

Baileys Chocolate Truffles - Christmas Recipe

Now look what's happened, I've forgotten my words and everything!
I love Christmas bling and edible gold leaf is a must at this time of the year, just take a deep breath and forget how ridiculously expensive it is. It's a pain to use and sticks to everything except what you want it to stick to. My truffles are so delicious and melt in the mouth that they are worthy of a little adornment.

The recipe is Baileys, coffee, chocolate, butter and cream - yum, yum yum!  Easy to make and far nicer than most truffles you can buy.

Makes: 12
300g plain chocolate
2 tbsp whipping cream
1 tbsp cold strong fresh espresso coffee
2 tbsp Baileys
55g softened salted butter
To decorate:
edible gold leaf
sifted cocoa powder
sifted icing sugar

You will need:  12 sweet cases, baking trays and clingfilm!

Method:
1. Add 100g of the chocolate and the cream to a bowl set over a saucepan of warm water.  Leave until melted.  Remove the bowl from the pan and add the espresso, Baileys and butter, whisk together until smooth and thickened. Cool, cover with clingfilm and chill until firm.
2. Line a baking tray with cling film. Remove the mixture from the fridge and when the mixture becomes pliable roll teaspoons of the mixture into balls using the palms of your hands. Place the truffles onto the tray.  Cover with more clingfilm and place in the freezer.
3. Remove the tray from the freezer.
4. Take a fresh tray and cover with clingfilm. Melt the remaining 200g of dark chocolate. Dip the truffles into the chocolate to coat. Place on the tray. When the chocolate is set place a tiny piece of gold leaf on top of the truffle to decorate.  Roll the remaining truffles in either the cocoa or icing sugar.

3 May 2014

Coffee Crunch Bars - Recipe

Coffee Crunch Bars
I love coffee and cake and these small crunchy bites were a fabulous accompaniment to my mid- morning latte.  If I was able to choose one of these cakes in a coffee shop I'd be more than delighted.  The sponge layer is light and the coffee and spiced crunchy topping is drizzled with an espresso icing.

I buy espresso powder for baking but it can also be used in chilli con carne for richness, depth of flavour and colour.

Makes: 18

You will need:  18cm shallow square tin base and sides lined with baking parchment paper

For the cake:
55g Stork
100g Caster Sugar
1 egg
5 tbsp thick natural yogurt (if there is any whey place into a fine sieve to drain off the whey)
125g self raising flour
½ tsp baking powder
pinch of salt
½ tsp vanilla extract

Topping:
85g plain flour
70g unsalted butter
½ tsp ground mixed spice
1½ tsp espresso powder
70g caster sugar
pinch of salt


Icing:
85g icing sugar
1 tbsp made espresso coffee

1. Preheat the oven to 180ºC.
2. Make the topping - into a bowl place the flour and butter into a bowl and rub the butter into the flour to resemble fine breadcrumbs.  Stir in the mixed spice, coffee and caster sugar.  Put on one side.
3. Make the sponge - add all of the ingredients into a bowl and mix for 2 minutes.
4. Pour the cake batter into the base of the prepared tin and level.
5. Sprinkle the topping evenly over the batter.
6. Bake for 35 minutes and test by inserting a skewer into the centre of the cake, if it comes out clean the cake is cooked.
7. Transfer the cooked tin to a cooling rack.  When the cake has cooled down - remove by holding onto the baking paper and placing on the cooling rack until completely cold.  When cold carefully remove the baking paper.
8. To make the icing - place the icing sugar into a bowl, gradually add the coffee.  If the mixture is too thick add a little water.
9. Place the cooled cake onto a board, cut into 18 pieces and drizzle over the icing.  Leave to set.

More recipe ideas using espresso powder
Cappuccino Cupcakes
Coffee Cappuccino Creams with Cream and Sweet Coffee Sauce

13 Mar 2014

Carrot Cake with Coconut and Pineapple - Recipe


I'm always happy to buy a coffee and a piece of carrot cake from Pret - the one I usually head for is situated in Selfridges Food Hall. It's the perfect place for a spot of people watching.

I really prefer indie coffee shops, but in the week they've mostly been taken over by 'suits' and laptops - try going into them with shopping bags and you feel like Bridget Jones entering the board room wearing the wrong attire.

Pret make the lightest moist carrot cake and I'm always happy with their coffee too, to be fair I like everything from Pret.  I've had their cookery book 'Food on the Move' for years now and it's amazing that they have shared their recipes with us.


I made my carrot cake in a tin with individual squares and made nine cakes, they were a bit on the large side though, next time I'm going to try 10 or 11 cakes.  The cake tin came from Lakeland.

Slightly adapted recipe - the iced cakes will freeze and thaw successfully.

You will need:  21cm square baking tin greased and lined with baking paper or a 12 hole square tin greased and base lined.

For the cake:
2 eggs
200g soft brown sugar
150ml vegetable oil
200g grated carrot
50g chopped walnuts
75g diced tinned pineapple
50g dessicated coconut
200g plain flour
1 tsp cinnamon
1tsp bicarbonate of soda
1/2 tsp salt

For the icing: (I made half this quantity)
400g sifted icing sugar
100g full fat cream cheese at room temperature
50g soft unsalted butter
1tsp vanilla extract

1. Preheat the oven to 150ºC.
2. Take an electric whisk at full speed and whisk the eggs until doubled in volume. Add the sugar, whisk until light and fluffy.  Whisking add the oil slowly.  Whisk until the mixture leaves a trail.
3. Fold in the carrots, walnuts, pineapple pieces and coconut.
4. Sift the flour, cinnamon, bicarb and salt over the batter.  Fold in gently.
5. Place the cake batter into the baking tin.  Bake for 1 hour for the square tin or 40 minutes for the small square cakes.
6. Cool the cakes for 15 minutes and turn out onto a cooling rack.

Method for the icing:
1. Beat the butter, cream cheese and vanilla extract together.
2. Beat in the sifted icing a third at a time (carefully otherwise the kitchen will be covered in icing sugar)
3. Spread the icing over the top of the cake.
4. Decorate.

31 Oct 2012

Coffee, Walnut and Raisin Cake - Recipe


I've always enjoyed coffee and walnut cake, and this recipe by Tana Ramsay from her book I Love to Bake! is perfect.  I particularly liked the addition of raisins and used huge plump raisins. It's best to dust the raisins with flour before stirring into the cake otherwise they may well sink to the bottom, which is exactly what happened to me.  I turned my cake over, and now the raisins are at the top of the cake, and I then happily slathered over the buttercream and sprinkled with chopped walnuts. I wasn't too sure about the coffee, walnut, raisin combo before I made the cake, but it works beautifully.

The cake doesn't need dressing up with a circle of neatly placed walnut halves, a scattering of walnut pieces is the way to go.  After all, the best dressed cake doesn't necessarily mean the cake is a winner.

Fortunately, not an overly sweet cake because the coffee butter cream is only on top, it is best not to be  tempted to cut it in half.  I used half the amount of butter cream suggested in the original recipe and found it was ample, and light brown sugar instead of caster sugar in the recipe, to give the cake more depth of flavour.

I've eaten the good, the bad and the disappointing coffee and walnut cake in coffee shops - this is the perfect coffee shop cake, it is moist, has a tender crumb, not too much topping and keeps well too. I cut mine into slices and popped it into the freezer and then kept going back to the freezer and taking out another slice, it is that good!  Hubby thought this was a great cake too, he isn't very keen on cakes buried beneath a mound of sweet buttercream, and he said the cake/buttercream ratio I used was perfect for him. Phew!

Many of the bakes in I Love to Bake! are cooked at 200ºC or 220ºC which is something to be aware of - the suggested temperature for this cake is 200ºC and the timing is 35 minutes - if I cooked a deep cake at this temperature my cake would burn, peak and the batter would be a horrible volcanic mass.  A few years ago I went on a Patisserie Course at the local college and they cooked everything, including cakes, at almost maximum temperatures. A Victoria Sandwich at college in commercial grade ovens cooked in 10 minutes!

Adapted recipe.

You will need:  a 20cm round cake tin 5cm deep (I used a springform tin), greased , floured and base lined with parchment paper.

For the sponge:

175g softened butter, 175g light brown sugar, 3 large eggs beaten, 3 tbsp room temperature milk, 175g sifted self-raising flour, 1 tsp baking powder, 2 tsp instant coffee granules dissolved in 1 tbsp boiling water, 80g walnut pieces chopped, 60g plump raisins dusted in flour.

1. Preheat the oven to 160ºC.
2. Beat the butter and sugar together until light and fluffy. Add the eggs and milk gradually whilst continuing to beat. Sift the flour and baking powder over and fold into the mixture. Stir in the dissolved coffee granules.
3. Pour the batter into the baking tin and bake for 30-35 minutes. If it isn't cooked through cover with foil and pop back in the oven for 10 minutes or until cooked. Cool the baked cake for 5 minutes, turn out onto a cooling rack.

For the topping you will need:

125g softened unsalted butter, 150g sifted icing sugar, 4 tsp instant coffee granules dissolved in 1 tbsp boiling water(cooled a little), 30g chopped walnuts.

1. Place the butter into a bowl and beat until soft, add the sifted icing sugar and the dissolved coffee granules. Beat with a mixer for 5/10 minutes until light and fluffy.
2. Spread the butter cream over the top of the cake and decorate with the chopped walnut pieces.


15 Sept 2012

Raspberry Tiramisu - Recipe


Raspberry Tiramisu is always delicious and very easy to make. A handful of raspberries are sprinkled over the coffee and brandy soaked sponge fingers and then hidden under a blanket of mascarpone cheese.


It's always best to make a Tiramisu the day before because it gives the flavours a chance to blend and get to know each other. The sponge fingers will have a chance to soften up too.

Finely grated dark chocolate is used instead of the usual dusting of cocoa powder.
Serves:  4

4 tablespoons very strong espresso coffee, 2 tablespoons brandy, 10 sponge fingers, 125g raspberries (either fresh or frozen), 175g mascarpone cheese, 2 separated eggs, 50g icing sugar, 25g finely grated plain chocolate

1. Mix together the coffee and brandy.  Dip the sponge fingers into the liquid to coat. Arrange in a small dish.  Pour over any liquid left in the dish.  Sprinkle the raspberries over the soaked sponge fingers.
2. Whisk together the mascarpone, egg yolks and icing sugar until smooth.
3. Whisk the egg whites until stiff and glossy, fold into the mascarpone mixture.
4. Spoon over the sponge fingers. Finely grate the chocolate over the top. Chill to set.

23 Jun 2012

Chocolate and Raspberry Tiramisu

Chocolate and Raspberry Tiramisu

Chocolate, coffee, raspberries, Amaretto liqueur and mascarpone are some of the fabulous ingredients used in this Tiramisu.  Unfortunately, I didn't have a lovely dish for my Tiramisu, it would have looked so much better but obviously wouldn't have tasted any different.

Some versions of Tiramisu aren't very exciting, and whilst this isn't authentic, it is a lightweight and zingy version. I prefer this dessert with fruit, it definitely adds another dimension, some may be horrified, but this is a winner and my hubby was more than delighted.

What's different about this Tiramisu?  After the base layer of coffee and Amaretto soaked sponge fingers, it has a layer of crushed raspberries and then a layer of mascarpone lightened with egg yolks, then whipped egg whites are folded into the mascarpone mix.  Another layer of soaked sponge fingers, topped with the remaining mascarpone mix and a dusting of cocoa powder.  Leave to set overnight.  Top with more crushed raspberries, a scattering of raspberries, and curls of white and dark chocolate. The recipe is from Woman and Home Feel Good Food Magazine Spring 2011.


This months challenge is Coffee and is hosted by Chocolate Log Blog and guest host this month is Lucy of The Kitchen Maid - We Should Cocoa - June 2012


Tea Time Treats this month is Summer Fruits and is hosted by Karen of Lavender and Lovage and this month the host is Kate from What Kate Baked

11 Dec 2011

Nigel Slater's Coffee and Walnut Cake


Do you think Nigel will approve of the way I have decorated the cake? I am guessing not, but I fell in love with these little coffee cup chocolates and decorated my coffee and walnut cake with them instead of the usual walnuts. Well, it is coming up to Christmas...........and if it looks good and tastes good, then that's ok with me.

These coffee cups were made especially for me (well perhaps not!). Here we have cappuccino, caramel macchiato, hazelnut latte and espresso.

The cake is light and fluffy, the buttercream can be made stronger with the addition of more coffee to counteract some of the sweetness, the tiny coffee cups are perfect......it's good enough to make you forget Christmas is on the horizon!

The cake keeps well and here is the recipe:

You will need: 2 x 21cm greased sponge tins.

For the cake: 175g softened butter, 175g unrefined golden caster sugar, 65g chopped walnut pieces, 3 large eggs, 175g self-raising flour, 1 tsp baking powder, 2 tsp instant coffee granules dissolved in 1 tbsp boiling water.

1. Preheat the oven to 180°C/gas Mark 4. Beat the butter and sugar until light, pale and fluffy. Add the eggs a little at a time to the butter and sugar, beating well after each addition.
2. Mix the flour and baking powder together and mix gently into the cake batter. Stir the dissolved coffee into the cake mix, followed by the chopped walnuts.
3. Divide the cake mixture between the two cake tins, smooth lightly and bake for 20-25 minutes.

For the buttercream: 200g softened butter, 400g icing sugar, 2 tsp instant coffee granules, 60g walnut halves.

To make the buttercream:

1. Beat the softened butter until soft and pale, add the icing sugar and beat until soft and fluffy. Dissolve the coffee granules in 1 tbsp boiling water and then mix into the buttercream. Fold in the walnut pieces.
2. Spread one of the cakes with a third of the buttercream, then place the second sponge on top, and spread the remaining buttercream on the top, and around the sides if you wish.

16 Jul 2011

Chocolate Covered Coffee Beans Cupcakes


It seems that once I get a theme going, I just don't know when to stop. Not so long ago, it was cupcakes and flowers and now it is cupcakes and chocolate.

Mr W and I went on a shopping spree for cake toppings and to make the cupcakes even more calorific, I have a box overflowing with wonderful chocolate cake toppings. The great thing about this theme is, I/we get to eat any decorations that are left over.

I made a vanilla cake base, piped with buttercream and simply topped them with these fabulous chocolate covered coffee beans from Waitrose.


You will need: A muffin tin lined with 12 cupcake cases

115g softened butter, 115g caster sugar, 115g self raising flour, 2 eggs, 1-2 tablespoons milk, 1 teaspoon vanilla extract.

1. Beat together the butter and caster sugar until soft and fluffy. Add the eggs slowly to the mixture, together with the vanilla extract and milk. Fold in the flour.
2. Divide the batter between 12 cupcake cases and cook in a preheated oven 180°C for 20-25 minutes until golden.

Buttercream Icing


250g unsalted butter, 500g icing sugar, 1 teaspoon vanilla extract, 1 tablespoon hot water

Simply mix all the ingredients together until light and fluffy.

10 May 2011

COFFEE & WALNUT CUPCAKES


Coffee and walnut cake, coffee and walnut cupcakes, both are in my top ten favourite cakes.

Some time back I was invited to the launch of Kenco Millicano. Designer Patrick Cox and Patissier Eric Lanlard teamed up with Kenco Millicano to create a Kenco Millicano 'Cake Pop'. Unfortunately, I couldn't attend because it was in London, and an evening event. I'm ok, honest, but I'm still not over missing out on this!

Kenco Millicano is a 'wholebean instant coffee': a combination of instant coffee and finely-milled Arabica coffee beans. Just perfect for making my coffee and walnut cakes.

Makes: 12

You will need: 12 hole muffin tray lined with muffin cases.

150g softened unsalted butter, 150g caster sugar, 175g self-raising flour, 3 eggs, 1 tablespoon Kenco Millicano.

1. Mix 1 tablespoon of Kenco Millicano in 1 tablespoon of boiling water. Leave to cool whilst you weigh out the other ingredients.
2. Preheat the oven to 180°C, 350°F, Gas Mark 4.
3. Put all the cake ingredients in a mixing bowl and beat for 2 minutes until light and creamy. Divide the mixture evenly among the cake cases.
4. Bake for 20-25 minutes.
5. Remove from oven and leave to cool in the bun tray.

Buttercream

You will need: 150g softened unsalted butter, 250g icing sugar, 1 teaspoon vanilla extract, 2 teaspoons hot water.

1. Put the butter and icing sugar in a bowl and beat until light and smooth.
2. Add the vanilla extract and hot water, beat again.

Thank you Kenco Millicano and Mel.

30 Nov 2008

Coffee Anyone?


I mentioned we had a new coffee machine earlier this year. Our old coffee machine died and we decided to do some research for a few weeks and investigate our options.

There are some amazing forums for coffee lovers where you can get advice overload! They are a very useful source of information, especially if you are about to make a leap up the coffee machine ladder.

We learnt very fast from the forums, the coffee grinder is the most important piece of equipment, and we purchased a Rancilio Rocky Coffee Grinder. My husband really, really wanted to be the proud owner of a Rancilio Silvio coffee machine but as I explained to him, the machine has to be moved to the front of the work surface to be used and the Rancillio weighs approximately 14kg. We eventually decided to buy a Gaggia Classic coffee machine weighing in at 8kg.


A jug is needed to foam the milk, a Gaggia thermometer for checking the milk and last but not least, top quality freshly roasted coffee beans which we purchase from Hasbean .


You can see by the foam on the milk that we are getting better, but not yet to Barista standard!

We are very happy with our choices and occasionally go to our local coffee shop, which happily for us has been voted the UK's best coffee house! Here you get treated to excellent coffee, topped with latte art.

This week I went to the Good Food Show in Birmingham, and out of curiosity, asked for a demo on a top of the range fully automatic coffee machine. I can only say how disappointed I was, the milk was made up of huge bubbles and the coffee was dire. To make a good cup of coffee, passion and enthusiasm is needed, pressing a button simply just won't do!

11 Mar 2007

The Cafetiere Dilemma


I own a couple of cafetieres - a large one to use for after dinner and a one cup cafetiere.
The large cafetiere is called a 'Smart Cafe' and was designed by Sebastian Conran. The only difference between this and the usual cafetiere is you fill a 'capture pod' with ground coffee and then you place this inside the cafetiere. After you have finished your coffee you then withdraw the plunger, unclip the pod and tap out the used grounds, straight into a bin. Unfortunately, this is quite a messy task.
I am not sure why, but I have to say this cafetiere does make a really good cup of coffee.
The small cafetiere works in the usual way, where you put the ground coffee straight into the inner jug and obviously, have to pour the used coffee into the sink and rinse away.
I think we are still waiting for the 'no mess' cafetiere to be invented!